Creative Chronicles: Mastering Visuals and Words

View

The Science of Visual Hierarchy in Graphic Design

by Bill Tiepelman

The Science of Visual Hierarchy in Graphic Design

Ever wonder why your eyes are drawn to certain parts of a design before others? That’s the magic of visual hierarchy—a subtle yet powerful tool that guides viewers through a composition. Whether it’s a website, a poster, or an ad, visual hierarchy ensures that the most important elements grab attention first, while the rest follow in a natural flow. In this guide, we’ll break down the science behind visual hierarchy, explore the techniques that make it work, and show you how to apply these principles to your designs for maximum impact. Ready to master the art of guiding the gaze? Let’s dive in. ` What is Visual Hierarchy? Visual hierarchy is the arrangement of elements in a design to signify their importance. It’s how we make sure the headline gets noticed before the subhead, the call-to-action button stands out over background images, and the eyes naturally move through the content in a logical order. At its core, visual hierarchy is about controlling attention. It takes advantage of how people naturally scan and process visual information. By understanding what grabs attention—size, color, contrast, and positioning—you can design layouts that are not only beautiful but also effective. Think of visual hierarchy as the traffic cop of your design: it tells the viewer where to stop, where to slow down, and where to proceed with caution. Principles of Visual Hierarchy To build effective visual hierarchy, you need to understand the principles that guide it. Here are the key factors to consider: Size: Bigger elements naturally draw more attention. A bold headline will always outshine smaller body text. Color: Bright or contrasting colors stand out, while muted tones recede into the background. Position: Elements placed at the top or center of a design are usually noticed first. Contrast: High contrast between elements—like light text on a dark background—helps important details pop. Proximity: Grouping related items together creates visual connections and reduces clutter. Whitespace: Empty space isn’t wasted—it’s a powerful way to emphasize key elements by isolating them. When combined, these principles work together to create a hierarchy that feels intuitive and engaging. Techniques for Establishing Visual Hierarchy Let’s move from theory to practice. Here are some actionable techniques for creating strong visual hierarchy in your designs: Use Typographic Hierarchy: Start with large, bold headlines for attention, medium-sized subheads for context, and smaller body text for details. Leverage Contrast: Pair contrasting colors or textures to make certain elements stand out. For instance, a bright red button on a muted background screams “click me.” Play with Scale: Use oversized images or icons to create focal points, while keeping secondary elements smaller. Follow the Z-Pattern: People often scan designs in a Z-shape (top left to bottom right). Align your key elements along this path. Incorporate Visual Cues: Use arrows, lines, or shapes to guide the viewer’s eye toward specific elements. The goal is to create a visual roadmap, making it easy for viewers to know where to look first, second, and third. Common Mistakes to Avoid Even seasoned designers can fall into traps when working with visual hierarchy. Here are some common mistakes to steer clear of: Overloading the Design: Trying to emphasize everything means emphasizing nothing. Pick one or two focal points per layout. Poor Contrast: Low contrast between text and background can make content hard to read and unappealing. Ignoring Whitespace: Filling every inch of space creates clutter and confusion. Let your design breathe. Too Many Fonts: Using more than two or three typefaces can disrupt the flow and confuse the viewer. By avoiding these pitfalls, you’ll ensure your designs are both polished and purposeful. Examples of Exceptional Visual Hierarchy Some brands and designs just get it right. Here are a few examples of exceptional visual hierarchy in action: Apple: Their product pages showcase clean, simple layouts with bold headlines, high-quality images, and perfectly spaced elements. Spotify: The app uses a dark background with bright green accents to direct attention to playlists and playback controls. The New York Times: Their online articles use clear typographic hierarchy to differentiate headlines, subheads, and body text, making content easy to scan. These examples demonstrate how visual hierarchy can elevate functionality while enhancing aesthetics. Final Thoughts Visual hierarchy is the unsung hero of graphic design. It’s what makes your work intuitive, engaging, and effective. By mastering the principles and techniques we’ve explored here, you’ll create designs that not only look stunning but also communicate clearly and efficiently. Remember, it’s not just about making things pretty—it’s about guiding the viewer’s experience. So, the next time you start a design project, ask yourself: Where do I want their eyes to go first? Got tips or tricks for mastering visual hierarchy? Share them in the comments—we’d love to hear from you!     Transform Your Designs with Expert Visual Hierarchy Techniques Visual hierarchy is the secret sauce behind effective and impactful designs. Whether you're creating a website, branding materials, or digital content, mastering hierarchy ensures your message stands out and engages your audience. At Unfocussed Photography and Imaging, we specialize in crafting designs that guide the viewer’s eye with precision and style. Custom Web and App Design: Let us help you create user-friendly layouts with clear hierarchy to enhance readability and interaction. Branding and Marketing Materials: Our designs use strategic hierarchy to make your logos, ads, and promotional items unforgettable. Design Consultations: Collaborate with our experts to refine your layouts and optimize your visual storytelling. Ready to elevate your designs with the power of hierarchy? Partner with us to create visuals that captivate and communicate effortlessly. Explore our services today and turn your vision into a masterpiece!

Read more

How to Use Color Contrasts for Impact

by Bill Tiepelman

How to Use Color Contrasts for Impact

Breaking the Rules: How to Use Color Contrasts for Impact Color is one of the most powerful tools in any designer’s arsenal. It grabs attention, evokes emotion, and can even tell a story. But while traditional color theory might urge you to stick to harmonious palettes, where’s the fun in playing it safe? Sometimes, the best designs come from breaking the rules and embracing bold, unexpected contrasts. Let’s dive into the rebellious world of color contrasts—how to use them, when to ignore the so-called “rules,” and how they can transform your designs from bland to breathtaking. The Science of Color Contrasts Before you can break the rules, you need to understand them. Color contrast isn’t just about making things “pop”; it’s rooted in science and psychology. The human brain is hardwired to notice differences, and contrasting colors create visual tension that immediately grabs attention. There are several types of color contrasts to consider: Hue Contrast: Colors on opposite ends of the color wheel (like blue and orange) create the most dramatic effect. Value Contrast: The difference between light and dark colors, such as black and white, can emphasize form and hierarchy. Saturation Contrast: Pairing vibrant, saturated colors with muted tones creates depth and balance. Understanding these principles allows you to manipulate contrast to your advantage, whether you’re aiming for subtle sophistication or in-your-face impact. When Rules Were Made to Be Broken Traditional design advice tells us to aim for harmony: analogous colors, gentle gradients, and subtle tones. And sure, that works—if you want your design to blend into the background. But what about when you want your work to stand out? Breaking the rules means embracing contrasts that shouldn’t work but do. Think electric pink paired with lime green, or deep purple against bright yellow. These combinations might sound jarring, but in the right context, they can feel fresh, energetic, and modern. Here’s a key takeaway: when breaking the rules, purpose matters. A loud, clashing palette is perfect for a concert poster but might feel inappropriate in a healthcare brochure. Know your audience and your goals before you go full neon explosion. Techniques for Using Bold Color Contrasts Now that we’ve embraced our inner rule-breaker, let’s talk techniques. How do you actually make bold color contrasts work in your designs? Here are some tried-and-true methods: Pair Complementary Colors: Opposites on the color wheel (like red and green or blue and orange) are natural attention grabbers. Use Contrast for Hierarchy: Highlight key elements like call-to-action buttons or headlines by giving them high-contrast colors. Play with Patterns: Combine contrasting colors in geometric patterns or textures for a dynamic, eye-catching effect. Add Neutral Anchors: Ground your bold colors with neutral tones like white, black, or gray to avoid overwhelming your audience. The key is balance. Let the contrasts shine without overwhelming the overall design. Bold doesn’t mean chaotic. Color Contrast in Digital Design In the digital world, color contrast isn’t just an aesthetic choice—it’s also a matter of functionality. High contrast improves readability, accessibility, and user experience. Ever tried reading yellow text on a white background? Yeah, don’t do that. Here’s how to use contrast effectively in digital design: Focus on Accessibility: Ensure text and background colors meet WCAG contrast ratio guidelines to be legible for all users. Create Focal Points: Use contrasting colors to draw attention to buttons, links, or key elements on a webpage or app. Consider Screen Differences: Colors can appear differently across devices, so test your designs on multiple screens. Digital design is where the marriage of function and flair comes to life. Nail your contrasts, and your designs will look good and work well. Iconic Examples of Bold Color Contrasts Don’t just take my word for it—look at the brands and artists who’ve mastered the art of contrast: Andy Warhol: His pop art prints juxtapose bold, clashing colors to create iconic, unforgettable imagery. Spotify: The brand’s bright green and black palette cuts through the noise and is instantly recognizable. Memphis Design Movement: This 1980s aesthetic pushed boundaries with clashing patterns and vibrant, contrasting colors. These examples prove that bold choices can lead to timeless results—if you have the confidence to embrace them. Final Thoughts Using bold color contrasts isn’t about throwing the color wheel out the window—it’s about understanding it well enough to break the rules intelligently. Whether you’re designing a poster, branding a company, or creating digital content, don’t be afraid to take risks with color. Because at the end of the day, safe designs might get a polite nod, but bold designs get remembered. Go ahead, break the rules, and let your colors clash. Just make sure it’s intentional—and fabulous. What are your favorite bold color combinations? Let us know in the comments—or better yet, show us your most daring designs!     Turn Bold Ideas Into Stunning Designs with Professional Services Bold color contrasts are more than eye-catching—they’re transformative. Whether you’re creating branding materials, digital interfaces, or standout promotional designs, having a professional touch ensures your ideas come to life with precision and impact. At Unfocussed Photography and Imaging, we specialize in crafting visuals that grab attention and leave lasting impressions. Custom Branding Solutions: Collaborate with our team to design logos, business cards, and marketing materials using bold, innovative color palettes. Web and Digital Design: Create dynamic digital interfaces with high-contrast elements optimized for usability and style. Creative Consultations: Work with our experts to refine your vision and choose the perfect color combinations for your project. Let’s turn your boldest ideas into designs that command attention and resonate with your audience. Explore our services today and bring your creative vision to life!

Read more

The Evolution of Minimalism in Modern Design

by Bill Tiepelman

The Evolution of Minimalism in Modern Design

Minimalism. Love it or hate it, you can’t escape it. It’s everywhere -from your tech gadgets to that painfully white Instagram aesthetic everyone seems to have adopted. But minimalism isn’t just a trendy buzzword; it’s a design movement that’s been stripping down the excess for decades, forcing us all to focus on what truly matters. (Spoiler: It’s not your collection of artisanal succulents.) So, how did minimalism evolve into the powerhouse of modern design it is today? Let’s take a journey through its stripped-back, sleek, and sometimes exasperating history.   The Origins: When Less Became More Minimalism wasn’t always about white walls and hidden storage. It started as a rebellion- an art movement in the post-World War II era that threw shade at the gaudy excess of previous styles. Think Bauhaus and De Stijl, where function took center stage, and ornamentation got tossed out like yesterday’s avocado toast. These pioneers believed design should be pure, functional, and, most importantly, not cluttered with pointless fluff. (Looking at you, baroque chandeliers.) Their mantra was simple: if it doesn’t serve a purpose, it doesn’t belong. Revolutionary, right? Minimalism Goes Mainstream Fast-forward to the mid-20th century, and minimalism started creeping into the mainstream. Scandinavian design took the torch, giving us IKEA and that sleek, affordable furniture you assemble while questioning every life choice. Architects like Ludwig Mies van der Rohe championed the “less is more” philosophy, turning glass and steel into their design weapons of choice. During this era, minimalism wasn’t just a style - it became a way of life. If your space wasn’t decluttered, were you even living? Minimalism in the Digital Age And then came the digital revolution. Suddenly, minimalism was everywhere - on your phone, your computer, even your favorite apps. Apple led the charge with its “flat design” aesthetic, ditching skeuomorphism (a fancy word for making digital things look real, like fake leather notebooks) for sleek, simple interfaces. The world ate it up. Designers embraced minimalism to cut through the chaos of the digital overload. Clean interfaces, intuitive navigation, and neutral palettes became the holy grail. Because who needs buttons with gradients when you can have crisp, flat icons that scream, “I’m modern and efficient!” Minimalism Today: Love It or Hate It? Today, minimalism has seeped into every corner of design. Fashion, interiors, branding -you name it, it’s been minimalized. But let’s be honest: it’s not for everyone. For some, it’s calming and chic. For others, it’s as cold and lifeless as an empty shopping mall. What’s undeniable, though, is minimalism’s staying power. It’s not going anywhere, and honestly, why should it? At its best, minimalism teaches us to focus on what’s essential, whether that’s in our spaces, our designs, or our lives. (Just maybe keep the white-on-white decor in check.) Final Thoughts Minimalism is the ultimate paradox - it’s about stripping things down, but its impact is anything but small. From its rebellious roots to its polished modern-day presence, minimalism continues to shape how we see and interact with the world. Whether you’re a fan or a critic, one thing’s clear: less really can be more -except when it comes to chocolate cake. Never skimp on chocolate cake. So, what’s your take on minimalism? Love it? Hate it? Let us know -preferably with no more than 100 words. We’re minimalists now.     Elevate Your Design Projects with Professional Graphic Design Services Graphic design is where creativity meets functionality, transforming ideas into compelling visuals. Whether you’re working on branding, digital content, or print materials, having a professional touch can make all the difference. At Unfocussed Photography and Imaging, we specialize in graphic design services tailored to your needs. Custom Designs: Collaborate with our experts to create logos, business cards, and promotional materials that reflect your unique style. Digital Content Creation: Stand out online with eye-catching social media graphics, website layouts, and marketing visuals. Print-Ready Graphics: From brochures to posters, we deliver high-quality designs optimized for professional printing. Ready to bring your vision to life? Let our graphic design team craft visuals that captivate your audience and enhance your brand identity. Explore our services today and take your design projects to the next level!

Read more

Writing for Film and TV

by Bill Tiepelman

Writing for Film and TV

Writing for Film and TV: Crafting Scripts with Visual Impact Writing for film and television is a unique art form that blends storytelling with visual and auditory elements. Unlike novels or short stories, scripts are blueprints for a collaborative medium, where directors, actors, and designers bring your words to life. To succeed as a screenwriter, you need to think in scenes, craft dynamic dialogue, and create a world that leaps off the page. In this guide, we’ll explore how to craft scripts with visual impact, from structuring your story to creating vivid settings and memorable characters. Whether you’re a budding screenwriter or an author transitioning to the screen, this guide will help you master the fundamentals of scriptwriting. Why Writing for Film and TV is Unique Screenwriting isn’t just about telling a story—it’s about showing it. Here’s what makes it different from other forms of writing: Economy of Words: Scripts are concise, relying on action and dialogue to convey meaning. Visual Storytelling: Scenes are designed to be seen, with minimal exposition and maximum visual impact. Collaborative Nature: Scripts are the starting point for a team effort, including directors, cinematographers, and actors. Understanding these distinctions is key to writing scripts that resonate with audiences and collaborators alike. Step 1: Master the Basics of Script Format Proper formatting is crucial in screenwriting—it ensures your script is easy to read and industry-standard. Here’s a quick breakdown: Scene Headings: Also called sluglines, they indicate the setting and time (e.g., INT. COFFEE SHOP - DAY). Action Lines: Describe what’s happening on screen in the present tense (e.g., She sips her coffee, staring out the window.). Dialogue: Centered text indicating what characters say, with optional parentheticals for tone or action. Transitions: Used sparingly to indicate scene changes (e.g., FADE IN:, CUT TO:). Tools like Final Draft, Celtx, or Scrivener can help you format your script correctly, saving time and ensuring professionalism. Step 2: Structure Your Story Screenplays typically follow a three-act structure, with clear beats to guide the narrative: Act One - Setup: Introduce the characters, setting, and conflict. End with the inciting incident that propels the story forward. Act Two - Confrontation: Develop the conflict, raising stakes and deepening character arcs. Act Three - Resolution: Bring the story to a climax, resolving major conflicts and leaving a lasting impression. Using tools like beat sheets or outlining software can help you structure your story effectively. Step 3: Write Visually In screenwriting, less is more. Focus on what the audience will see and hear: Show, Don’t Tell: Replace internal thoughts with actions and visuals. For example, instead of saying “She’s nervous,” write, “Her fingers tap a rapid rhythm on the table.” Be Specific: Describe settings and actions vividly but concisely. For example: “A cluttered desk lit by a single flickering lamp” is more effective than “A messy desk.” Think Cinematically: Imagine your scenes as a series of shots, considering angles, lighting, and movement. Writing visually helps directors and cinematographers translate your vision to the screen. Step 4: Craft Dynamic Characters Memorable characters are the heart of any great script. Here’s how to make them stand out: Give Them Goals: Every character should want something, whether it’s love, revenge, or redemption. Create Flaws: Imperfections make characters relatable and drive conflict. Write Authentic Dialogue: Capture their voice through unique speech patterns, vocabulary, and tone. For example: “I don’t think that’s a good idea” vs. “Nah, I wouldn’t do that.” Subtle changes convey personality and background. Step 5: Develop Engaging Dialogue Dialogue in scripts is sharp, purposeful, and layered with subtext. Consider these tips: Advance the Plot: Use dialogue to reveal information or push the story forward. Reveal Character: Show who they are through what they say and how they say it. Keep It Brief: Avoid long monologues unless absolutely necessary. Great dialogue feels natural yet intentional, reflecting real speech while serving the narrative. Step 6: Use Visual Motifs and Themes Visual motifs are recurring images or symbols that reinforce your story’s themes. For example: Light and Shadow: Represent moral ambiguity or internal conflict. Color Palettes: Use color to reflect mood or character arcs. Objects: A recurring object, like a locket or a scar, can symbolize key emotional beats. These elements add depth and cohesion to your screenplay, leaving a lasting impression on viewers. Step 7: Workshop and Refine Screenplays are rarely perfect on the first draft. Seek feedback from trusted readers or join a writing group to workshop your script. Focus on: Pacing: Does each scene move the story forward? Are there slow sections that need trimming? Clarity: Is your script easy to visualize and understand? Impact: Are your emotional beats landing effectively? Rewriting is where good scripts become great, so don’t shy away from making changes. Final Thoughts Writing for film and TV is both challenging and rewarding, offering the opportunity to create stories that connect with audiences in powerful, visual ways. By mastering the art of screenwriting—combining structure, character, and visual storytelling—you can craft scripts that stand out and leave a lasting impact. So grab your pen, laptop, or scriptwriting software and start bringing your stories to the screen. Your next big idea is just a scene away.     Bring Your Script to Life with Professional Screenwriting Support Screenwriting is more than just storytelling—it’s about crafting a vision that captivates both readers and viewers. Whether you’re writing your first screenplay or refining a project for the industry, professional guidance can elevate your work to cinematic brilliance. At Unfocussed Photography and Imaging, we offer services designed to help screenwriters bring their ideas to life. Script Formatting and Polishing: Ensure your screenplay adheres to industry standards with expert formatting and editing support. Visual Storyboarding: Collaborate with our team to create stunning visuals for key scenes, bringing your vision to the screen before production begins. Creative Consultations: Get one-on-one feedback and brainstorming sessions to refine your characters, plot, and dialogue. Don’t let your screenplay remain just a dream. Partner with us to transform your story into a masterpiece ready for film or TV production. Explore our services today and take the first step toward seeing your script on the screen!

Read more

The Relationship Between Typography and Storytelling

by Bill Tiepelman

The Relationship Between Typography and Storytelling

Dynamic Duo: The Relationship Between Typography and Storytelling Storytelling is about more than just the words you choose—it’s about how those words are presented. Typography, the art and technique of arranging type, plays a powerful role in shaping the way your story is perceived. From the elegance of serif fonts in literary novels to the boldness of sans-serif fonts in sci-fi adventures, typography can evoke emotions, convey themes, and even become part of the narrative itself. In this guide, we’ll explore how typography and storytelling intersect, offering practical tips and creative insights to help you make your text as dynamic and engaging as your words. Why Typography Matters in Storytelling Typography isn’t just about aesthetics—it’s a storytelling tool that can amplify your message. Here’s why it matters: Establishes Tone: A flowing script font sets a romantic tone, while a blocky typeface suggests grit or tension. Enhances Readability: Thoughtful typography ensures your story is easy and enjoyable to read, keeping your audience engaged. Creates Visual Identity: The fonts you choose can become a signature style for your book, brand, or project. Supports Themes: Typography can subtly echo the mood, setting, or era of your story, adding depth and cohesion. From subtle cues to bold statements, the way your words look is just as important as what they say. Step 1: Understand the Basics of Typography Before diving into creative applications, it’s helpful to know some typography fundamentals. Here are the key elements: Font Styles: Fonts are often categorized as serif, sans-serif, script, or decorative. Each conveys a different tone. Kerning: The spacing between individual letters. Adjusting kerning can affect readability and aesthetics. Leading: The vertical space between lines of text. Proper leading ensures text feels open and comfortable to read. Hierarchy: Using different font sizes or weights to emphasize headings, subheadings, or key points. These building blocks form the foundation of effective typography and storytelling synergy. Step 2: Match Typography to Your Story’s Tone The fonts you choose should reflect the tone of your story. Consider these examples: Romance: Elegant script fonts like Great Vibes or Playfair Display evoke softness and intimacy. Horror: Distressed or jagged fonts like Creepster or Cold Dead Hands convey unease and tension. Sci-Fi: Futuristic sans-serif fonts like Orbitron or Exo suggest innovation and technology. Historical Fiction: Classic serif fonts like Garamond or Baskerville echo timeless elegance and tradition. By aligning typography with tone, you create a cohesive experience that draws readers into your narrative world. Step 3: Use Typography to Build Atmosphere Typography can enhance your story’s atmosphere through visual cues. For example: Handwritten Fonts: Use script or handwritten fonts to simulate diary entries or personal letters within the story. Period-Appropriate Fonts: Match fonts to your story’s era, like Art Deco styles for 1920s settings or Gothic fonts for medieval tales. Abstract Layouts: Experiment with creative text arrangements to mimic a chaotic or dreamlike environment. These techniques can make your story’s presentation feel more immersive and intentional. Step 4: Establish a Typographic Hierarchy Readers rely on visual cues to navigate text. Creating a clear typographic hierarchy ensures your story flows smoothly: Headings: Use larger, bolder fonts to mark chapters or sections. Subheadings: Employ slightly smaller or italicized text to break up content without overwhelming the reader. Body Text: Choose a clean, legible font for the main text, prioritizing readability over flair. Emphasis: Highlight key phrases with bold, italics, or color to draw attention without overusing effects. Consistent hierarchy helps readers navigate your story intuitively, enhancing their overall experience. Step 5: Incorporate Typography as a Narrative Element Typography doesn’t just support storytelling—it can become part of the story itself. For example: Visual Emphasis: Use bold, oversized text to convey a character shouting or emphasizing a critical moment. Text Shapes: Arrange text in shapes, like spirals or waves, to mimic movement or abstract concepts. Font Changes: Switch fonts to represent different voices, perspectives, or time periods within the story. These creative approaches can add visual intrigue and deepen reader engagement. Step 6: Balance Creativity with Readability While typography offers endless creative possibilities, readability should always come first. Here’s how to strike the right balance: Avoid Overcrowding: Leave plenty of white space to make your text feel open and inviting. Stick to Two or Three Fonts: Too many fonts can overwhelm readers; focus on a cohesive palette. Test Readability: Ensure your typography works well in different formats, from print to digital screens. Balancing creativity with functionality ensures your typography enhances, rather than detracts from, your storytelling. Step 7: Create a Visual Brand for Your Story Typography can extend beyond your story’s pages, becoming part of your branding. For example: Book Covers: Use distinctive fonts to create eye-catching designs that reflect your story’s essence. Social Media Graphics: Apply your typography choices consistently across posts, teasers, and promotions. Merchandise: Incorporate your story’s fonts into themed products like posters, bookmarks, or apparel. Establishing a typographic identity makes your story instantly recognizable and memorable. Final Thoughts The relationship between typography and storytelling is a dynamic one, offering endless opportunities to enhance your narrative with thoughtful design. From setting the tone to shaping the reading experience, typography is a tool every writer should consider. So go ahead—experiment with fonts, layouts, and creative designs to make your words truly unforgettable. Your story deserves to look as good as it sounds.     Transform Your Typography Dreams into Stunning Designs Typography is more than just letters—it’s art, emotion, and storytelling. Whether you’re creating an ornate monogram, experimenting with stylized lettering, or crafting a unique typographic identity for your project, we can help bring your vision to life. At Unfocussed Photography and Imaging, we specialize in typography design tailored to your creative needs. Custom Letter Designs: Collaborate with our experts to design intricate letters, monograms, or logos that align with your vision. Typography Consultation: Receive professional guidance on selecting and blending fonts for your brand, book, or project. Digital and Print Applications: Use your custom typography in book covers, marketing materials, or personal projects. Don’t let your typographic ideas remain dreams—turn them into reality with professional design services that capture your style and creativity. Explore our services today and bring your letters to life!

Read more

AI and the Evolution of Creative Prompts for Writers

by Bill Tiepelman

AI and the Evolution of Creative Prompts for Writers

AI and the Evolution of Creative Prompts for Writers Writing is an art, but even the most seasoned writers need inspiration to keep the creative gears turning. Traditionally, writers have relied on prompts from books, workshops, or brainstorming sessions. But with the rise of artificial intelligence (AI), a new world of possibilities has opened up for generating creative prompts that are tailored, dynamic, and endlessly imaginative. In this guide, we’ll explore how AI is revolutionizing the way writers find inspiration, the benefits of using AI-generated prompts, and practical ways to incorporate them into your creative process. If you’re ready to supercharge your storytelling, let’s dive in! What Are AI-Generated Prompts? AI-generated prompts are creative writing ideas, scenarios, or questions generated by artificial intelligence tools. Unlike traditional prompts, which are static, AI-generated prompts are: Dynamic: They adapt to your preferences, themes, or genres. Endlessly Creative: They can generate unique ideas based on vast datasets of stories, trends, and concepts. Interactive: Some AI tools allow you to tweak prompts, brainstorm ideas, or explore variations. Whether you’re crafting a novel, a screenplay, or a blog, AI prompts can serve as a springboard for fresh, unexpected ideas. Why Writers Should Use AI for Prompts AI isn’t just a tool—it’s a creative partner that can transform your writing process. Here’s why it’s worth embracing: Overcoming Writer’s Block: Struggling to start a scene? AI can generate prompts that nudge you in the right direction. Expanding Creativity: AI introduces concepts you might not have considered, pushing you beyond your usual boundaries. Tailored Inspiration: Many tools allow you to specify genres, themes, or styles, ensuring prompts align with your goals. Efficiency: Instead of spending hours brainstorming, you can quickly explore dozens of ideas with AI. With AI, the question isn’t “What should I write?” but “Which amazing idea should I choose?” Step 1: Choose the Right AI Tool There are numerous AI tools designed to assist writers, each with its strengths. Here are some popular options: ChatGPT: Ideal for generating detailed, conversational prompts based on specific scenarios or themes. Sudowrite: A creative writing tool tailored to fiction writers, offering prompts, character development ideas, and plot suggestions. Rytr: Perfect for short-form prompts, blog ideas, or content brainstorming. Plot Generator: A specialized tool for crafting story ideas, including characters, conflicts, and resolutions. Explore different platforms to find one that aligns with your writing style and needs. Step 2: Customize Your Prompts AI works best when you guide it with specific parameters. Here’s how to tailor prompts to your creative goals: Specify Your Genre: Mention if you’re writing fantasy, romance, sci-fi, or another genre. For example, “Give me a fantasy prompt about a rebellious prince.” Define Your Themes: Focus on themes like betrayal, redemption, or friendship. For instance, “Generate a prompt about betrayal in a dystopian world.” Include Characters: Add details about your protagonist or antagonist. For example, “A prompt for a story featuring a fearless journalist uncovering a conspiracy.” The more details you provide, the more aligned the prompts will be with your vision. Step 3: Experiment with Prompt Variations One of the most exciting aspects of AI-generated prompts is their adaptability. Most tools allow you to tweak or regenerate prompts. Try variations like: “What if” Scenarios: Generate prompts that reimagine classic tropes. For example, “What if Romeo and Juliet lived in a futuristic city?” Reversing Expectations: Flip a traditional idea. For instance, “A villain who is forced to save the world they planned to destroy.” Expanding Ideas: Start with a basic prompt and ask the AI for more details or twists. For example, “Expand on this prompt: A secret map leading to a hidden city.” Experimentation leads to unique, exciting narratives you might not have discovered on your own. Step 4: Use AI to Enhance Existing Ideas AI isn’t just for new ideas—it can also help develop stories you’ve already started. Here’s how: Scene Development: Ask the AI to generate dialogue, action, or descriptions for a scene you’re struggling with. Character Arcs: Request prompts that explore your character’s growth, conflicts, or relationships. Plot Twists: Generate unexpected turns or challenges to keep your narrative engaging. For example: “How would my protagonist react to discovering their best friend is a spy?” Step 5: Balance AI Prompts with Your Voice While AI is a powerful tool, it’s important to maintain your unique voice and creativity. Here’s how to strike the right balance: Personalize Prompts: Use AI ideas as a foundation, but add your own flair and perspective. Edit Thoughtfully: Refine AI-generated content to ensure it aligns with your tone and style. Blend Ideas: Combine multiple prompts or merge them with your original concepts for a richer narrative. AI enhances your creativity—it doesn’t replace it. Step 6: Keep a Prompt Library As you experiment with AI-generated prompts, save the ones that resonate with you. Organize them into categories like: Settings (e.g., futuristic cities, haunted castles). Characters (e.g., reluctant heroes, enigmatic mentors). Conflict (e.g., forbidden love, political intrigue). Having a library of prompts ensures you’re never short on inspiration, even during creative slumps. Final Thoughts AI is revolutionizing the way writers find inspiration, offering an endless well of ideas that are dynamic, adaptable, and deeply creative. Whether you’re brainstorming a new story or overcoming writer’s block, AI-generated prompts can spark ideas that take your writing to new heights. So why wait? Dive into the world of AI-powered prompts and discover where your imagination can take you. Your next great story is just a click away.     Supercharge Your Creativity with Professional AI Writing Tools AI is revolutionizing the way writers brainstorm, create, and refine their stories. Why settle for writer’s block when you can access endless inspiration tailored to your needs? At Unfocussed Photography and Imaging, we provide tools and services to enhance your storytelling process with cutting-edge AI technology. Custom AI Writing Prompts: Get personalized prompts crafted to fit your genre, themes, or characters. Story Development Support: Use AI-powered tools to explore new ideas, develop scenes, and refine your narratives. Workshops and Resources: Access guides and workshops designed to integrate AI into your writing process seamlessly. Don’t let your creativity stall—embrace the future of writing with AI-enhanced tools that elevate your craft and open new possibilities. Explore our services today and discover how AI can transform your storytelling journey!

Read more

Visual Inspiration for Historical Fiction

by Bill Tiepelman

Visual Inspiration for Historical Fiction

Visual Inspiration for Historical Fiction: Researching and Recreating the Past Historical fiction is a unique blend of imagination and authenticity. As a writer, your job is to transport readers to a different time while keeping your story engaging and believable. But how do you recreate a world that no longer exists? The answer lies in visual inspiration—using art, photographs, artifacts, and architecture to bring the past to life. In this guide, we’ll explore how to research and incorporate visual elements into your historical fiction, giving your story the richness and depth it deserves. Why Visual Research Matters in Historical Fiction Visuals are more than decorative—they’re a bridge to understanding the past. Here’s how they can enhance your historical fiction: Authenticity: Accurate visuals ensure your settings, characters, and details feel true to the era. Immersion: Describing visuals helps readers imagine themselves in the historical world you’ve created. Storytelling Depth: Artifacts, architecture, and clothing can become plot devices or symbols in your story. Visual research makes your historical fiction more engaging, providing a vivid backdrop that complements your narrative. Step 1: Gather Visual References Start by collecting images that capture the essence of your chosen time period. Here’s where to look: Museums and Archives: Visit local museums or explore online archives like the Library of Congress or the British Museum. Art and Photography: Study paintings, sketches, or early photographs to understand clothing, landscapes, and daily life. Historical Documents: Look for maps, blueprints, or diagrams that depict your story’s settings. Reenactments and Documentaries: Watch period dramas or attend historical reenactments for immersive visuals. Organize your references into categories like fashion, architecture, and daily life to keep your research manageable. Step 2: Use Architecture to Set the Scene Buildings are a window into history, reflecting the culture, technology, and priorities of the time. When describing settings, think about: Material: What were buildings made of? Stone, wood, or brick? These details convey the era’s resources and engineering capabilities. Style: Was it Gothic, Baroque, or Victorian? Architectural styles reflect cultural influences and values. Function: How were spaces used? A bustling market square differs vastly from a stately manor. For example, describing the high ceilings and stained glass of a medieval cathedral can set a scene of grandeur and spirituality, while a cramped tenement conveys struggle and resilience. Step 3: Recreate Historical Fashion Clothing is another key element of visual storytelling, revealing class, profession, and personality. To make your descriptions authentic, research: Fabrics: Were clothes made of wool, silk, or cotton? What dyes and patterns were available? Styles: Look at period-specific garments like corsets, tunics, or waistcoats. Accessories: Hats, jewelry, and shoes often signified status or regional identity. For example: “Her dress, a muted olive green, bore the subtle sheen of silk—a luxury she could ill afford but wore nonetheless, paired with well-worn boots that betrayed her struggles.” Step 4: Incorporate Artifacts Artifacts can add depth and realism to your story. Think about objects your characters might interact with daily: Tools: Farming equipment, medical instruments, or artisan tools can highlight professions and technologies. Personal Items: Diaries, letters, or jewelry can serve as character-defining details or plot devices. Weapons: From swords to muskets, weaponry often reflects the conflict or era your story explores. These objects can also symbolize themes or serve as metaphors, adding layers to your narrative. Step 5: Use Color to Reflect the Era Colors in historical settings were often dictated by available dyes, materials, and cultural meanings. Researching these details can make your descriptions more vivid: Medieval Europe: Rich reds, deep blues, and golds for the nobility; earthy browns and greens for peasants. 19th Century: Muted pastels, industrial grays, or vibrant florals depending on the setting. Ancient Civilizations: Bright ochres, cobalt blues, and terra cotta tones reflecting natural pigments. Consider how color can convey mood or status in your scenes. Step 6: Blend Research with Creativity While authenticity is crucial, remember that historical fiction is still fiction. Use your research as a foundation, but don’t be afraid to embellish or adapt details to serve your story. For example: Combine elements from different sources to create unique settings. Use visual descriptions sparingly to avoid overwhelming readers with too much detail. Focus on details that enhance mood, character, or plot. Creativity bridges the gap between history and storytelling, making your world both believable and compelling. Step 7: Build a Visual Archive As you write, maintain a visual archive to refer back to. This could include: Folders of images categorized by topic. Mood boards with key colors, textures, and visuals. Sketches or diagrams of settings and costumes. Having these references handy can streamline your writing process and ensure consistency throughout your story. Final Thoughts Visual inspiration is the key to writing historical fiction that feels authentic and alive. By immersing yourself in the art, architecture, and artifacts of your chosen era, you can create a world that captivates readers and transports them to another time. So start your research, gather your references, and let the past inspire your future masterpiece. Your historical world is waiting to be discovered.     Bring Your Historical World to Life with Expert Visual Design Writing historical fiction is an art that blends imagination with authenticity. But to truly transport your readers, you need visuals that capture the essence of your chosen era. At Unfocussed Photography and Imaging, we specialize in creating bespoke visual aids that bring your historical world to life. Custom Visual Research: Collaborate with our team to gather detailed references for architecture, fashion, and artifacts tailored to your narrative. Illustrations and Storyboards: Use stunning visuals to visualize key scenes, settings, or character moments with historical accuracy. Historical Marketing Materials: Enhance your book covers, promotional designs, or visual storytelling with period-appropriate aesthetics. Let us help you transform your historical fiction into an immersive experience with visuals that resonate and inspire. Explore our services today and take your readers on a journey they’ll never forget!

Read more

How Color Theory Shapes Emotional Beats in Stories

by Bill Tiepelman

How Color Theory Shapes Emotional Beats in Stories

Colors aren’t just a feast for the eyes—they’re a powerful tool for storytelling. Whether you’re writing a gripping thriller, a heartwarming romance, or an epic fantasy, the strategic use of color can elevate your narrative, evoking emotions and enhancing the mood of your scenes. This is where color theory comes into play—a fascinating intersection of art and psychology that can transform the way you write. In this guide, we’ll explore how you can use color theory to shape the emotional beats of your story, from crafting vivid settings to symbolizing character arcs. Let’s dive in and discover the language of color. What Is Color Theory? Color theory is the study of how colors interact and how they influence perception and emotions. It’s widely used in art, design, and film, but its principles are just as impactful in writing. Here are the basics: Primary Colors: Red, blue, and yellow—these are the foundation of all other colors. Secondary Colors: Orange, green, and purple—created by mixing primary colors. Tertiary Colors: Combinations like red-orange and blue-green, offering a broader palette. Colors also have symbolic and psychological meanings, which vary across cultures but often share common threads. For example, red frequently symbolizes passion or danger, while blue evokes calmness or melancholy. Why Color Matters in Storytelling In writing, colors can influence how readers feel about a scene, setting, or character. Here’s how they can enhance your storytelling: Set the Mood: Use color to create an atmosphere, whether it’s cozy and inviting or eerie and unsettling. Symbolize Themes: Assign colors to represent concepts like hope, despair, or transformation. Reflect Character Arcs: Show growth or decline through color changes in a character’s environment, clothing, or associations. Colors speak to readers on a subconscious level, making your story richer and more immersive. Step 1: Choose a Palette for Your Story Start by thinking about the overall tone of your narrative. Is it dark and brooding, light and whimsical, or somewhere in between? Choose a palette that reflects your story’s mood: Warm Colors: Red, orange, and yellow evoke energy, passion, and warmth. Cool Colors: Blue, green, and purple convey calmness, mystery, or melancholy. Neutral Colors: Black, white, and gray add balance, sophistication, or starkness. For example, a dystopian novel might lean on grays and muted tones, while a fantasy adventure could use vibrant greens and golds to reflect magical settings. Step 2: Use Color to Shape Settings Settings are an excellent place to incorporate color theory. Vivid descriptions can transport readers into your world while setting the emotional tone. Consider these examples: A Thrilling Chase: “Neon lights flickered in sharp blues and greens, casting jagged shadows across the rain-soaked streets.” A Romantic Interlude: “The room glowed with soft amber light, the golden hues reflecting off the polished wood floors.” A Haunting Scene: “The sky turned a sickly gray, and the once-vivid fields faded into desolate, ashen tones.” Experiment with contrasting colors to heighten tension or harmonize them to create a sense of calm. Step 3: Use Colors to Define Characters Characters can be associated with specific colors that reflect their personalities, emotions, or arcs. Think about: The Hero: Blues for loyalty and calm, or reds for bravery and passion. The Villain: Dark purples or blacks to signify mystery, danger, or corruption. The Love Interest: Soft pinks or peaches to evoke warmth and affection. Colors can also evolve alongside characters. For example, a timid character who begins in pale, muted tones might adopt bolder, more vibrant colors as they grow into their confidence. Step 4: Symbolize Key Themes with Color Colors can be used symbolically to reinforce your story’s themes. Consider recurring motifs that tie into your narrative: Hope and Renewal: Green as a symbol of growth, life, and fresh beginnings. Despair and Danger: Red or black to signify peril or emotional darkness. Transformation: Gold to reflect achievement or purple for spiritual growth. Subtly weaving these colors into your descriptions creates a deeper resonance with readers. Step 5: Experiment with Contrast and Harmony Playing with contrasting or harmonious colors can heighten the emotional impact of your scenes: Contrast: Juxtapose warm and cool tones to highlight conflict, like a fiery red sunset over icy blue mountains. Harmony: Use analogous colors (those close to each other on the color wheel) to create unity and flow, like shades of green and yellow in a serene forest. These techniques help you manipulate the reader’s focus and mood with precision. Step 6: Incorporate Visual Inspiration To refine your use of color, consider creating a mood board or visual reference for your story. Tools like Canva, Pinterest, or even physical collages can help you explore palettes and themes. You can also: Study Films: Notice how directors use color to shape mood and character (e.g., the stark blues and reds in Blade Runner). Observe Nature: Real-world landscapes are full of color combinations that inspire vivid descriptions. Visual references make it easier to translate colors into compelling prose. Step 7: Use Color for Foreshadowing Colors can subtly hint at future events, adding layers of meaning to your narrative. For instance: A character always associated with white may suddenly appear in red, foreshadowing a dramatic change or betrayal. A once-vibrant setting might fade to muted tones, signaling an impending tragedy. Foreshadowing with color rewards observant readers and makes your story feel intricately woven. Final Thoughts Color theory is a powerful tool for writers, offering endless possibilities for enriching your story’s emotional beats. By thoughtfully incorporating colors into your settings, characters, and themes, you can create a more immersive and emotionally resonant narrative. So grab your palette—whether it’s literal or figurative—and start painting your story with the hues of emotion and meaning. Your readers will thank you for it.     Transform Your Storytelling with Expert Color Theory Applications Colors aren’t just aesthetic choices—they’re emotional anchors that can shape your story’s mood, characters, and themes. Whether you’re building vivid settings, crafting symbolic character arcs, or foreshadowing dramatic moments, professional design expertise can elevate your narrative to the next level. At Unfocussed Photography and Imaging, we specialize in helping writers integrate the power of color into their storytelling with bespoke visual tools and creative support. Custom Color Palettes: Collaborate with our team to design unique color schemes tailored to your story’s tone and themes. Scene Visualizations: Let us create vivid, color-infused visuals to bring your key settings and emotional beats to life. Marketing Design: Use professionally crafted visuals for book covers, promotional materials, and branding that align with your story’s palette. Ready to enhance your storytelling with the art of color? Let us help you create visuals that resonate deeply with your audience. Explore our services today and bring your story’s colors to life!

Read more

Integrating Visual and Textual Foreshadowing

by Bill Tiepelman

Integrating Visual and Textual Foreshadowing

The Art of Creating Prophecies: Integrating Visual and Textual Foreshadowing Prophecies are a classic storytelling device, adding intrigue, tension, and depth to your narrative. Whether they’re cryptic riddles, ancient inscriptions, or whispered predictions, prophecies can act as a narrative compass, hinting at the future while shaping your characters’ decisions. But crafting a compelling prophecy is about more than just clever wording—it’s an opportunity to blend text with visuals for a richer storytelling experience. In this guide, we’ll explore how to create engaging prophecies and weave them into your story using both written and visual foreshadowing. Let’s dive into the art of crafting prophecies that captivate your audience and leave them eager to uncover the truth. Why Prophecies Matter in Storytelling Prophecies are more than plot devices—they’re thematic anchors that add layers of meaning to your story. Here’s why they’re so impactful: Build Anticipation: Prophecies create a sense of inevitability, keeping readers hooked as they try to piece together what will happen. Shape Characters: How your characters interpret and react to a prophecy can reveal their values, fears, and motivations. Foreshadowing: Prophecies allow you to plant clues about future events, making the payoff more satisfying when everything clicks into place. Add Mystique: The cryptic nature of prophecies lends an air of mystery and magic to your world. But to create a truly memorable prophecy, you need to balance ambiguity with clarity, ensuring readers are intrigued but not confused. Step 1: Define the Purpose of Your Prophecy Before writing your prophecy, consider its role in the story. Ask yourself: What key events or themes does the prophecy foreshadow? How will it influence your characters’ actions or decisions? Will the prophecy be literal, symbolic, or open to interpretation? For example, a prophecy about a chosen hero might foreshadow a climactic battle, while a more abstract prophecy could hint at a character’s internal journey or moral dilemma. The purpose guides the prophecy’s tone and structure. Step 2: Craft the Wording Writing a prophecy is an art form in itself. The language should be evocative, poetic, and slightly cryptic. Here are some tips: Use Imagery: Incorporate vivid descriptions and metaphors to create a sense of mystery. For example, “The silver serpent shall coil around the sun” could symbolize betrayal or an eclipse. Play with Structure: Experiment with rhyme, rhythm, or repetition to give the prophecy an otherworldly feel. For instance: “When the three stars align, the shadow shall fall, and the kingdom will tremble.” Leave Room for Interpretation: Avoid being too literal. Ambiguity keeps readers guessing and allows for twists. For example, “The crownless king will rise” might refer to a hidden heir or a revolutionary leader. The wording should fit seamlessly into your world’s tone and style, whether it’s high fantasy, dystopian, or historical fiction. Step 3: Integrate Visual Foreshadowing Prophecies don’t have to live solely in the text—they can be visual as well. Consider incorporating symbolic imagery into your story to complement the prophecy. For example: Artifacts: A stained glass window depicting the prophecy’s key events, or a tapestry showing cryptic symbols. Natural Signs: Celestial phenomena like eclipses, comets, or unusual weather patterns that align with the prophecy. Recurring Motifs: Colors, animals, or objects that subtly appear throughout the story, reinforcing the prophecy’s themes. Visual foreshadowing deepens the prophecy’s impact and rewards observant readers with satisfying “aha” moments. Step 4: Create Tension Through Interpretation One of the most engaging aspects of a prophecy is how characters interpret it. Will they try to fulfill it, avoid it, or dismiss it as superstition? How their interpretation aligns—or clashes—with reality creates dramatic tension. For example: A character might misinterpret a prophecy, leading to unintended consequences. A villain could manipulate the prophecy to serve their own agenda. A skeptic might ignore the prophecy entirely, only to realize its truth too late. Characters’ reactions to the prophecy reveal their beliefs, values, and vulnerabilities, adding depth to the narrative. Step 5: Weave the Prophecy Throughout the Story A prophecy isn’t a one-and-done element—it should be woven into the fabric of your story. Here’s how to keep it relevant: Recurring Mentions: Let characters reference the prophecy in dialogue, debates, or reflections. Subtle Clues: Drop hints that align with the prophecy’s wording, building suspense without giving too much away. Twists: Subvert expectations by revealing hidden meanings or loopholes in the prophecy. This consistent integration keeps the prophecy at the forefront of readers’ minds while allowing for surprises and revelations. Step 6: Deliver a Satisfying Payoff The resolution of the prophecy should feel earned, whether it unfolds exactly as predicted or takes an unexpected turn. Consider: Literal Fulfillment: The events play out exactly as foretold, confirming the prophecy’s power. Symbolic Fulfillment: The prophecy’s true meaning is revealed, surprising both characters and readers. Subverted Fulfillment: The prophecy is intentionally misinterpreted or manipulated, leading to an ironic twist. Whatever approach you choose, ensure the prophecy ties back to your story’s themes and characters, creating a sense of closure and cohesion. Examples of Prophecies in Fiction Harry Potter: The prophecy about “the one with the power to vanquish the Dark Lord” shapes Harry’s destiny while leaving room for interpretation about who it refers to. The Hunger Games: The Mockingjay symbol serves as a visual prophecy of rebellion and hope, with Katniss embodying its meaning. The Lord of the Rings: The prophecy of Aragorn as the returning king is both a literal and symbolic journey of restoration and redemption. These examples show how prophecies can enrich storytelling when crafted thoughtfully. Final Thoughts Prophecies are more than cryptic predictions—they’re narrative tools that add depth, tension, and intrigue to your story. By combining evocative language with visual foreshadowing, you can create prophecies that resonate with readers and elevate your worldbuilding. So go ahead—craft a prophecy that challenges your characters, captivates your audience, and leaves them eagerly turning the page. The future of your story awaits.     Bring Your Prophecies to Life with Stunning Visual Design Prophecies are more than just cryptic words—they’re gateways to deeper storytelling, blending intrigue, symbolism, and thematic depth. Whether your story requires ancient inscriptions, glowing symbols, or visual foreshadowing, we can help you craft prophecies that captivate your audience and enrich your worldbuilding. At Unfocussed Photography and Imaging, we specialize in transforming your narrative visions into compelling visual elements that resonate. Custom Prophecy Designs: Collaborate with our team to create manuscripts, symbols, or artwork that visually represent your story’s prophecies. Worldbuilding Visuals: Enhance your storytelling with detailed visuals for artifacts, inscriptions, and recurring motifs. Digital and Print Integration: Use professional designs for book interiors, marketing materials, or immersive worldbuilding guides. Let us help you craft unforgettable prophecies that go beyond the page, bringing your story to life in vibrant detail. Explore our services today and elevate your storytelling with stunning visuals!

Read more

Designing Symbols and Logos for Fictional Worlds

by Bill Tiepelman

Designing Symbols and Logos for Fictional Worlds

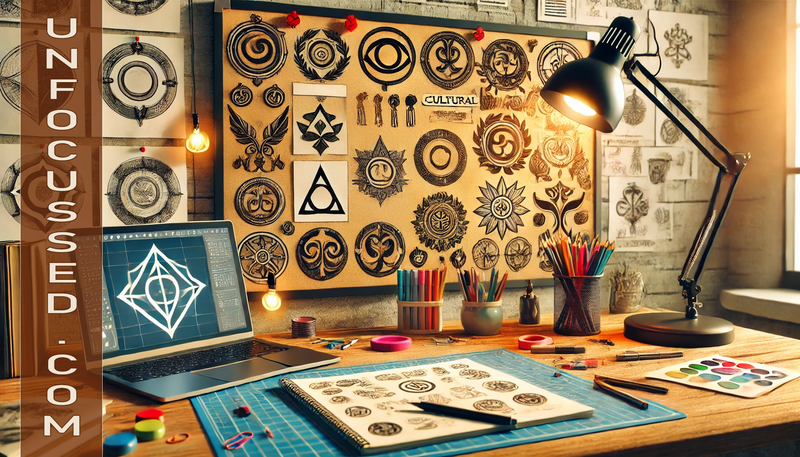
Every fictional world, whether it’s a sprawling fantasy realm or a gritty cyberpunk dystopia, thrives on its details. Symbols and logos are among the most powerful tools for adding depth to your world. They’re not just decorative—they represent ideologies, institutions, and cultures. A well-designed symbol or logo can become a visual shorthand for your story’s themes and conflicts, instantly recognizable to your audience. From the Mockingjay pin in The Hunger Games to the insignias of noble houses in Game of Thrones, symbols leave a lasting impression. In this blog, we’ll dive into how to create compelling logos and symbols for your fictional worlds, blending creativity with storytelling purpose. Why Symbols Matter in Storytelling Symbols and logos do more than look cool—they serve as touchstones for your audience, reinforcing the identity and mood of your world. Here’s why they’re so impactful: Convey Identity: A symbol can instantly communicate the values, history, or culture of an organization or faction. Unify Elements: Logos can connect disparate parts of your world, from guilds to governments, under a cohesive aesthetic. Enhance Immersion: Symbols make your world feel real, as though it has its own history and visual language. Drive Conflict: A symbol can represent opposing sides in a struggle, adding tension and meaning to your story. Whether it’s a crest, flag, or secret sigil, the right design can anchor your worldbuilding and make your story unforgettable. Step 1: Define the Purpose of Your Symbol Before you start sketching, think about the role your symbol or logo will play in your story. Ask yourself: Who or what does the symbol represent? (A faction, organization, or belief system?) What values or traits should the design convey? (Strength, mystery, rebellion?) Where will the symbol appear? (On flags, uniforms, architecture, or artifacts?) For example, a rebel group’s emblem might need to feel bold and defiant, while a royal family’s crest might exude elegance and tradition. The purpose guides the design process. Step 2: Draw Inspiration from Real-World Symbols Great fictional symbols often draw on real-world examples. Look to history, art, and culture for inspiration: Heraldry: Medieval crests and coats of arms are full of symbolic elements like animals, colors, and patterns. Religious Icons: Crosses, mandalas, and other sacred symbols can inspire designs that feel timeless and meaningful. Corporate Logos: Sleek, modern designs can serve as templates for futuristic or minimalist worlds. Study how these designs convey meaning through shapes, colors, and simplicity, then adapt those principles to your story. Step 3: Choose Shapes and Layouts Shapes play a crucial role in the emotional impact of your symbol. Here’s a quick breakdown: Circles: Represent unity, harmony, and infinity. Ideal for peaceful or holistic groups. Triangles: Suggest power, ambition, and conflict. Often used for aggressive or hierarchical organizations. Squares: Convey stability, strength, and reliability. Perfect for governments or institutions. Abstract Shapes: Add intrigue and mystery, especially for secret societies or mystical groups. Experiment with layouts, combining shapes to create unique designs that resonate with your story’s themes. Step 4: Incorporate Symbolic Imagery Now it’s time to add visual elements that give your symbol meaning. Think about motifs that align with your world’s culture, history, or philosophy: Animals: A lion for bravery, a raven for intelligence, a serpent for cunning. Plants: A laurel for victory, an olive branch for peace, a thorn for danger. Elements: Fire for destruction, water for purity, stars for hope. Tools or Objects: Swords, crowns, or books can symbolize power, royalty, or knowledge. Layer these elements strategically to create a design that tells a story in itself. Step 5: Play with Colors Colors are more than aesthetic choices—they carry emotional and cultural weight. Choose colors that align with your symbol’s purpose: Red: Passion, danger, rebellion. Blue: Loyalty, calm, authority. Gold: Wealth, divinity, excellence. Black: Power, mystery, elegance. Use bold contrasts for striking designs or monochromatic palettes for subtlety and sophistication. Step 6: Simplify for Impact The best symbols are simple enough to be recognizable at a glance. Avoid cluttering your design with too many elements. Instead, focus on: Clear lines and shapes. Minimal but meaningful details. A balanced composition. A streamlined design ensures your symbol remains iconic, whether it’s seen on a banner, carved into stone, or shrunk down to fit on a pin. Step 7: Test Your Design Once your symbol is complete, test it in different contexts. Ask yourself: Does it look good at various sizes? Does it communicate the intended meaning? Does it align with the aesthetics of your fictional world? Share the design with beta readers or collaborators for feedback. Refining the design based on their insights can make it even stronger. When Symbols Become Icons A well-crafted symbol or logo does more than decorate—it becomes an integral part of your story’s identity. Over time, it can take on a life of its own, inspiring fan art, merchandise, and deeper engagement with your world. Think of the Mockingjay pin or the Stark direwolf - symbols that became cultural touchstones. Final Thoughts Designing symbols and logos for your fictional world is an opportunity to enrich your storytelling with visual depth and meaning. By combining thoughtful design with cultural and narrative elements, you can create symbols that resonate with readers and elevate your worldbuilding. So grab your sketchbook or design software and start creating symbols that will leave a lasting impression. Your world is waiting for its visual identity.     Create Iconic Symbols with Professional Design Services Symbols and logos aren’t just decorative—they’re the beating heart of your fictional world’s identity. From royal crests to rebellious emblems, the right design can bring depth and meaning to your story. At Unfocussed Photography and Imaging, we specialize in crafting bespoke visuals that reflect the soul of your worldbuilding. Custom Symbol and Logo Design: Work with our team to develop unique emblems that capture the essence of your world’s factions, cultures, or themes. Worldbuilding Aesthetics: Enhance your storytelling with cohesive designs for flags, artifacts, and visual motifs. Digital and Print-Ready Files: Receive high-quality designs ready for use in books, promotional materials, or merchandise. Don’t let your world go without its iconic mark. Let us help you create symbols that resonate with readers and make your story unforgettable. Explore our services today and bring your vision to life!

Read more

Adapting Written Stories into Visual Narratives

by Bill Tiepelman

Adapting Written Stories into Visual Narratives

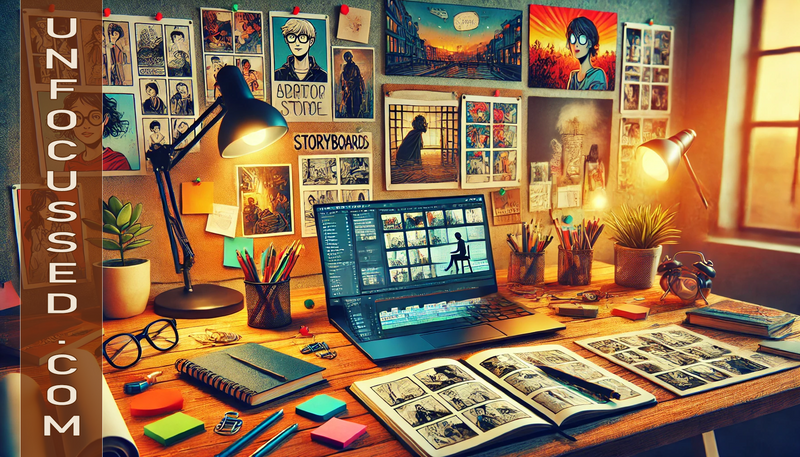
From Words to Graphics: Adapting Written Stories into Visual Narratives Some stories beg to leap off the page and into a visual medium, whether as a graphic novel, webcomic, or storyboard. The combination of text and imagery can elevate storytelling to new heights, immersing readers in your world through rich visuals and dynamic pacing. But how do you adapt a written story into a visual narrative without losing its essence? Adapting your story into a visual format is an exciting challenge. It forces you to think cinematically, streamline your plot, and focus on key moments that translate well into images. In this guide, we’ll explore how to adapt your written work into a visual masterpiece, step by step. Why Adapt a Story into a Visual Narrative? Before diving into the how, let’s talk about the why. Visual narratives offer several unique advantages: Broader Appeal: Graphic novels and webcomics attract a diverse audience, including visual learners and those who may not typically read prose. Dynamic Storytelling: Visuals can convey emotion, action, and atmosphere in ways that words alone often cannot. Engaging Pacing: Panels and layouts let you control the flow of your story, creating dramatic pauses, rapid action, or cinematic transitions. Market Opportunities: The graphic novel industry is thriving, offering new avenues for publishing and marketing your story. If you’ve ever dreamed of seeing your words come to life visually, this is your chance to make it happen. Step 1: Choose the Right Format The first decision you’ll need to make is the format of your visual adaptation. Each medium has its own strengths: Graphic Novels: Perfect for longer, more complex stories. They allow for detailed worldbuilding and layered narratives. Webcomics: Ideal for episodic storytelling or serialized content, with the flexibility to publish online at your own pace. Storyboards: Great for planning screen adaptations, visualizing key scenes, or pitching your story to collaborators. Consider your story’s length, structure, and themes when choosing the format that best suits your vision. Step 2: Streamline Your Story Adapting a prose story into a visual narrative requires trimming the fat. Visual storytelling thrives on brevity and impact, so focus on the core elements: Main Plot: Identify the central conflict and ensure it remains the driving force of your story. Key Characters: Streamline your cast to avoid overwhelming your audience with too many faces. Essential Scenes: Highlight the moments that define your story—introductions, turning points, climaxes, and resolutions. Think of this process as creating a visual skeleton of your story. Once the framework is in place, you can layer in details and nuance. Step 3: Create a Visual Script A visual script is a hybrid between a traditional script and a storyboard outline. It breaks your story into panels or scenes, describing the action, dialogue, and visuals for each one. Here’s a basic format: Page 1, Panel 1: - Setting: A bustling marketplace. - Action: The protagonist moves through the crowd, scanning faces. - Dialogue: (Protagonist, thought bubble) "Where is he? He said he’d be here." Focus on: Panel Layouts: Decide how many panels per page and how they’re arranged for pacing and emphasis. Transitions: Use visual transitions (like close-ups, wide shots, or zooms) to guide the reader’s eye. Dialogue and Captions: Keep text concise, letting the visuals do most of the storytelling. This step bridges the gap between written storytelling and visual execution. Step 4: Collaborate with Artists If you’re not an artist yourself, this is where collaboration comes in. Finding the right illustrator or designer is crucial to capturing your vision. Here’s how to start: Research Styles: Look at graphic novels or webcomics you admire and identify the styles that resonate with your story. Create a Mood Board: Collect images, colors, and designs that convey the tone of your story to share with potential collaborators. Use Freelance Platforms: Sites like Behance, ArtStation, and Fiverr are great places to find talented artists. Be clear about your expectations, provide detailed references, and maintain open communication throughout the process. Step 5: Focus on Visual Themes Visual narratives aren’t just about drawing pretty pictures—they’re about using imagery to enhance storytelling. Think about: Color Palettes: Use colors to set the mood for each scene or reflect character arcs. Symbolism: Incorporate visual motifs that add depth and meaning to your story. Lighting and Atmosphere: Play with shadows, highlights, and textures to create a sense of place and emotion. For example, a dark, muted palette might signify danger or mystery, while bright, vibrant tones suggest hope and energy. Step 6: Embrace the Iterative Process Creating a visual narrative is a collaborative, iterative process. Be prepared for revisions as you and your artist refine each page or panel. Consider feedback from beta readers or early audiences to ensure your story resonates both visually and narratively. Step 7: Publish and Share Once your visual narrative is complete, it’s time to share it with the world. Consider the following platforms: Print Publishing: Submit your graphic novel to publishers or self-publish through services like Amazon KDP. Online Platforms: Publish webcomics on platforms like Webtoon, Tapas, or your own website. Social Media: Use platforms like Instagram or TikTok to share snippets and promote your work. Engage with your audience by sharing behind-the-scenes looks at your creative process, from early sketches to final pages. Final Thoughts Adapting a written story into a visual narrative is a transformative experience. It challenges you to rethink your story’s structure, focus on its visual elements, and collaborate with talented artists to bring your vision to life. Whether it becomes a graphic novel, a webcomic, or a storyboard, your story gains a new dimension that captivates and inspires. So grab your script, sketch out your panels, and take the leap into visual storytelling. Your story is ready to be seen.     Bring Your Stories to Life with Professional Visual Storytelling Services Transforming your written story into a visual masterpiece doesn’t have to be overwhelming. Whether you’re dreaming of a graphic novel, a webcomic, or a detailed storyboard, we’re here to help you every step of the way. At Unfocussed Photography and Imaging, we specialize in creating stunning visuals that bring your narrative to life. Custom Storyboards: Collaborate with our team to outline your story visually, frame by frame. Character and Scene Design: Let us craft detailed visuals that capture the essence of your story’s characters and key moments. Graphic Novel and Webcomic Support: From conceptualization to finished panels, we provide the artistic expertise you need to make your story shine. Don’t just tell your story—show it. Let us help you create a visual narrative that captivates and inspires. Explore our services today and bring your vision to life!

Read more

Character Archetypes and Their Visual Representations

by Bill Tiepelman

Character Archetypes and Their Visual Representations

In every great story, characters are the lifeblood that keeps readers hooked. But what makes some characters so memorable? It’s their archetypes—the timeless patterns of behavior and personality that resonate with audiences. From the bold hero to the cunning trickster, archetypes tap into universal human experiences, making characters relatable and compelling. But here’s a secret many writers overlook: a character’s visual representation can be just as powerful as their personality. The way you describe their appearance, clothing, posture, and even the colors associated with them can deepen their impact. In this blog, we’ll explore common character archetypes and how to use visual details to bring them to life. What Are Character Archetypes? Archetypes are recurring roles or patterns in storytelling, rooted in mythology, psychology, and culture. They provide a framework for creating characters who feel both familiar and fresh. Think of archetypes as the foundation—you can build on them, twist them, or subvert them to suit your story. Some classic archetypes include: The Hero: Brave, determined, and driven by a noble cause. The Mentor: Wise, experienced, and a guiding light for the protagonist. The Villain: Dark, ambitious, and often a reflection of the hero’s flaws. The Trickster: Clever, mischievous, and unpredictable, often a catalyst for change. The Caregiver: Compassionate, nurturing, and selfless, always putting others first. While these archetypes are a starting point, the real magic happens when you add layers of depth and originality through their visuals. 1. The Hero: Visualizing Bravery The hero is often the centerpiece of your story, and their visual representation should reflect their strength, courage, and inner journey. Consider: Posture: A hero stands tall, with confident shoulders and a purposeful stride. Even in moments of doubt, their physicality suggests resilience. Clothing: Heroes often wear practical or symbolic outfits—a knight’s armor, a pilot’s jacket, or even a simple outfit that reflects their humble beginnings. Colors: Use bold, inspiring colors like red (passion), blue (honor), or gold (achievement) to represent their role. Example: Katniss Everdeen from The Hunger Games wears simple, utilitarian clothing that mirrors her practicality and survival skills, but her fiery Mockingjay costume becomes a symbol of rebellion and hope. 2. The Mentor: Wisdom in Every Detail Mentors are the guiding forces in a hero’s journey, and their visuals should exude wisdom and experience. Think about: Age and Appearance: A grizzled beard, wrinkles around the eyes, or a serene expression can suggest a lifetime of knowledge. Accessories: Mentors often carry symbolic items—a staff, a book, or a talisman—that reflect their expertise. Colors: Earthy tones like brown and green evoke grounded wisdom, while white or gold can suggest enlightenment. Example: Gandalf from The Lord of the Rings is instantly recognizable with his flowing gray robes, long beard, and iconic staff, embodying the archetype of the wise guide. 3. The Villain: Visualizing Darkness A great villain should be as visually striking as they are morally complex. Their appearance can project power, fear, or even a deceptive charm. Consider: Silhouettes: Sharp angles, flowing capes, or exaggerated features can make villains visually imposing. Contrasts: Use dark colors like black, red, or deep purple to emphasize danger, but consider adding an unexpected element (e.g., a pristine white suit) for intrigue. Facial Features: Scars, mismatched eyes, or an eerily perfect face can hint at their inner turmoil or sinister nature. Example: Darth Vader’s towering figure, mechanical breathing, and sleek black armor make him an unforgettable villain who commands fear and respect. 4. The Trickster: Mischief in Every Detail Tricksters thrive on unpredictability, and their visuals should reflect their playful, chaotic energy. Think about: Posture and Movement: Tricksters often have a loose, fluid way of moving, always ready to spring into action or mischief. Clothing: Their outfits might be eccentric, colorful, or layered with hidden tools and tricks. Colors: Bright, contrasting colors like orange, yellow, or purple highlight their quirky, attention-grabbing nature. Example: Loki from the Marvel universe combines a sleek, mischievous smile with flamboyant green and gold armor, reflecting his cunning and flair for drama. 5. The Caregiver: Visualizing Compassion Caregivers radiate warmth, and their visuals should make them feel approachable and nurturing. Consider: Expressions: A gentle smile, soft eyes, or an open posture that invites trust. Clothing: Practical, comfortable outfits that suggest a readiness to help, like aprons or simple tunics. Colors: Soothing hues like soft pinks, blues, or greens evoke their calming presence. Example: Molly Weasley from Harry Potter embodies the caregiver archetype with her warm sweaters, kind demeanor, and fierce protection of her family. Mixing and Subverting Archetypes While archetypes provide a foundation, your characters don’t have to fit neatly into one box. Mixing archetypes or subverting their visual cues can add complexity: The Hero with a Villain’s Edge: A protagonist who wears black, hinting at their inner darkness. The Villain in Disguise: A seemingly charming, pastel-clad antagonist who hides a dangerous agenda. The Mentor-Turned-Trickster: A wise guide who uses humor and deception to teach lessons. Breaking the mold keeps your characters fresh and unexpected while maintaining their archetypal appeal. Final Thoughts Character archetypes are timeless for a reason—they tap into universal truths about humanity. But it’s how you bring them to life visually that makes them unforgettable. By using posture, clothing, colors, and symbolic details, you can turn familiar archetypes into rich, multidimensional characters that leap off the page. So the next time you’re crafting a character, think about how they would look on screen or in a painting. Their visuals might just be the key to unlocking their soul.     Bring Your Characters to Life with Professional Design Services Character archetypes are the foundation of great storytelling, but their true power lies in how they’re brought to life. Imagine seeing your hero, villain, or trickster visually realized, with every detail reflecting their personality and journey. At Unfocussed Photography and Imaging, we specialize in turning your character ideas into stunning visual representations. Custom Character Illustrations: Collaborate with our artists to create detailed portraits of your characters that align with their archetypes and traits. Worldbuilding Visuals: Enrich your story’s world with bespoke designs for settings, symbols, and props that reflect your characters’ roles. Marketing and Promotion: Use professionally designed visuals for book covers, promotional materials, or social media campaigns. Your characters deserve to stand out—let us help you make them unforgettable. Explore our services today and bring your characters to life like never before!

Read more

The Intersection of Writing and Cinematography

by Bill Tiepelman

The Intersection of Writing and Cinematography

The Intersection of Writing and Cinematography: Framing Your Scenes Like a Director As writers, we are often told to "show, don't tell." But what does that actually mean? It’s about creating vivid, immersive scenes that play out in the reader's mind like a movie. And who does this better than directors? Borrowing techniques from cinematography can elevate your writing, helping you craft more dynamic, visually engaging, and emotionally resonant scenes. In this blog, we’ll explore how thinking like a director can transform your storytelling. From framing and lighting to pacing and transitions, you’ll discover how to approach your scenes with a cinematic lens. Why Writers Should Think Like Directors Directors use a mix of visual and emotional tools to guide their audience through a story. As a writer, you can adopt similar techniques to enhance your storytelling. Here's why it's worth thinking like a director: Enhanced Visualization: Framing your scenes like a movie helps you focus on what the audience (or reader) sees, hears, and feels. Heightened Drama: Cinematic techniques like lighting and perspective can amplify the emotional impact of key moments. Memorable Atmospheres: Thinking cinematically helps you build vivid settings and moods that linger with readers long after they’ve closed the book. Ready to direct your scenes? Let’s break down the core techniques. 1. Framing: The Writer’s “Camera” In filmmaking, framing determines what the audience sees in a shot. As a writer, your words are the camera. You decide whether to zoom in on a character's trembling hands or pan out to reveal an army on the horizon. Framing directs the reader’s focus and creates perspective. For example: Close-up: “Her fingers trembled as she clutched the photograph, her breath hitching with every beat of her heart.” Wide shot: “Beneath the golden glow of the setting sun, the endless expanse of the battlefield stretched out before her, dotted with the silhouettes of weary soldiers.” Ask yourself: Where do I want the reader’s eye to go? What details are most important to the scene’s emotional or narrative impact? 2. Lighting and Mood Lighting is one of the most powerful tools in a director’s arsenal, and writers can use it too. Describing light (or the absence of it) can instantly set the tone of a scene. Bright lighting: “The morning sun spilled through the curtains, painting the room in soft golds and yellows, a promise of new beginnings.” Low lighting: “The single bulb flickered overhead, casting long shadows that danced along the damp, cracked walls.” Consider how the interplay of light and shadow reflects your scene’s mood. Is it warm and inviting, or cold and ominous? Using light creatively can make your descriptions pop and evoke stronger emotions. 3. Motion and Movement Directors use camera movement—like tracking shots or zooms—to convey energy and guide the audience’s eye. In writing, you can replicate this effect by describing action dynamically. Static moment: “The assassin stood motionless, his silhouette blending into the shadows of the alley.” Dynamic movement: “The camera raced down the alley, trailing the assassin as he vaulted over crates and darted through narrow passages.” Play with pacing and transitions to mimic motion. A fast-paced sentence with short, sharp words conveys urgency, while long, flowing descriptions create a sense of calm or grandeur. 4. Perspective: Whose Eyes Are We Seeing Through? In cinematography, the perspective or "camera angle" determines how the audience experiences a scene. As a writer, point of view (POV) serves the same purpose. Consider experimenting with angles: Overhead/omniscient: “From above, the town looked like a patchwork quilt, its streets winding like rivers through the maze of rooftops.” First-person/internal: “The heat of the crowd pressed in on all sides, and I could barely hear my own thoughts over the roar of voices.” Switching perspectives can create intimacy or distance, depending on what the scene requires. 5. Transitions and Scene Breaks Directors use cuts, fades, and transitions to move between scenes or highlight contrasts. Writers can achieve similar effects through clever transitions. For example: Hard cut: “The explosion shattered the quiet. Seconds later, all that remained was smoke and silence.” Soft fade: “As the sun dipped below the horizon, the stars began to blink to life, one by one.” Experiment with different styles of scene transitions to match the tone of your story and maintain a cinematic flow. 6. Soundscapes: Describing the Invisible Sound is a key part of any cinematic experience, and you can use it to immerse your readers. What does the scene sound like? Is it eerily silent or filled with overlapping noises? Incorporate auditory details to add depth. Example of silence: “The room was so quiet that she could hear the faint hum of the refrigerator in the next room.” Example of noise: “The market buzzed with life—vendors shouting, carts clattering, and the sharp laughter of children weaving through the crowd.” Describing sound engages another sense, making your scene more vivid and immersive. Final Thoughts: Direct Your Scenes Like a Pro By thinking like a director, you can transform your writing into a visual and emotional experience that sticks with readers. Use framing to guide their focus, lighting to set the tone, and movement to bring energy to your scenes. With these tools, your story will feel like a movie playing in your readers' minds. So the next time you’re crafting a scene, step into the director’s chair. Action!     Transform Your Writing with Professional Visual Storyboarding Services Why settle for imagining your scenes when you can see them come to life? Visualizing your story like a director doesn’t just enhance your writing—it brings clarity, energy, and inspiration to your creative process. Whether you’re crafting immersive scenes, planning a screenplay, or refining your book’s world, professional visual tools can make all the difference. At Unfocussed Photography and Imaging, we offer services designed to help writers elevate their storytelling with cinematic precision. Custom Storyboards: Collaborate with our experts to map out your scenes in dynamic visual detail. Scene Visualization: Let us create tailored visuals of your key moments to inspire your writing and refine your ideas. Worldbuilding Art: Enhance your storytelling with stunning illustrations of your settings, characters, and more. Don’t just write your story—direct it. Bring your vision to life with visuals that captivate and inspire. Explore our services today and take your storytelling to the next level!

Read more

How Pictures Can Break Writer’s Block

by Bill Tiepelman

How Pictures Can Break Writer’s Block

Visualizing the Scene: How Pictures Can Break Writer’s Block We’ve all been there: staring at a blank page, willing the words to come, but instead, your brain serves up static. Writer’s block can feel like a creative void, but here’s a secret weapon you might not have tried—pictures. Yes, pictures. Visualizing your scenes through images can be the spark that reignites your imagination and gets those words flowing again. Whether you’re struggling with a complex action sequence, a heartfelt conversation, or a vivid setting, visual aids can help you break through and bring clarity to your writing. Let’s explore how pictures can transform your writing process and banish writer’s block for good. Why Visualizing Your Scenes Helps As writers, we’re constantly translating the movie in our minds into words on a page. But when that movie feels fuzzy, it’s hard to find the right words. Visualizing your scenes—whether through photos, sketches, or even AI-generated art—can help you: Clarify Details: Seeing a setting or character can inspire the specifics you need to make your writing vivid. Spark Creativity: A single image can trigger ideas for dialogue, mood, or even plot twists. Strengthen Description: Visual references make it easier to write richly detailed scenes that immerse readers. Overcome Decision Paralysis: Pictures can give you a starting point when you’re overwhelmed by choices. Think of pictures as shortcuts to inspiration—a way to jumpstart your creativity when the words won’t come. Step 1: Define the Scene Start by asking yourself: What’s the purpose of this scene? Is it a tense confrontation, a serene moment of reflection, or a pivotal action sequence? Understanding the scene’s emotional core will help you find or create images that align with its tone. For example: A battle scene might need visuals of chaotic motion, clashing weapons, and dynamic lighting. A romantic scene might focus on soft lighting, intimate spaces, or small, tender details. A mysterious setting might include foggy landscapes, shadowy corners, and eerie lighting. Write down a few key words or phrases that describe the scene’s vibe to guide your visual search. Step 2: Find or Create Visual References Now it’s time to gather images that match your vision. Here are some options: Use Photography: Search for relevant photos on platforms like Unsplash or Pinterest. For example, if your scene takes place in a forest, look for images that capture the light, texture, and atmosphere you want. Sketch It Out: Even if you’re not an artist, a rough sketch can help you map out a character’s placement or the layout of a room. AI-Generated Art: Tools like DALL-E or MidJourney allow you to create custom visuals based on detailed prompts. Need a glowing castle under a starry sky? AI can make it happen. Don’t worry about finding or creating the perfect image. The goal is to generate ideas, not to produce a finished piece of art. Step 3: Analyze the Image Once you have a visual reference, spend a few moments studying it. Ask yourself: What stands out to me in this image? How does the lighting, color, or texture affect the mood? What small details catch my eye, and how can I incorporate them into my writing? For example, if you’re looking at an image of a bustling marketplace, you might notice the vivid colors of fabrics, the clamor of street performers, or the wary glance of a character in the background. These details can enrich your scene and make it feel alive. Step 4: Use the Visual to Start Writing Here’s where the magic happens. With your visual reference in hand, start describing what you see. Don’t worry about perfection—just get the words down. Use the image as a springboard for sensory details, character actions, or environmental cues. For example: Describe the way sunlight filters through a stained-glass window, casting colorful patterns on the floor. Capture the tension in a character’s clenched fists or the way their shadow stretches across the wall. Write about the sound of distant waves or the scent of rain-soaked earth. Even if your scene evolves beyond the image, the act of writing from a visual prompt can help you find your footing and keep going. Step 5: Expand Your Toolbox If you find visual references helpful, consider building a library of them for future use. Create folders or boards for specific categories, such as: Settings (forests, cities, interiors) Characters (faces, outfits, postures) Moods (dramatic, serene, eerie) These collections can become invaluable resources when you need a quick burst of inspiration or a way to refine your vision. When to Use Visuals Visualizing your scenes is especially useful when: You’re Stuck: A picture can provide the clarity you need to move forward. Details Feel Flat: Images help you add depth and texture to your descriptions. You Need Fresh Ideas: Looking at visuals unrelated to your story can spark unexpected connections. Use visuals as a tool, not a crutch—they’re meant to enhance your creativity, not replace it. Final Thoughts Writer’s block doesn’t have to be the end of the road. By turning to visual references, you can unlock new perspectives, refine your storytelling, and rekindle your creative spark. Whether you’re studying a photograph, sketching a scene, or generating AI art, pictures can be the key to bringing your story to life. So next time you’re staring at that blank page, try looking at a picture instead. You might be surprised at how quickly the words start flowing.     Break Through Writer’s Block with Professional Visual Storytelling Tools Struggling to find the words? Let visuals be your guide. Whether you need inspiration for a vivid setting, a compelling character, or the mood of a pivotal scene, we can help you bring your imagination to life. At Unfocussed Photography and Imaging, we specialize in creating tailored visual tools that spark creativity and break through the toughest blocks. Custom Visual References: Collaborate with us to generate bespoke images for your story’s characters, settings, and themes. Mood Boards and Scene Concepts: Enhance your storytelling with professionally designed visual aids that align with your vision. AI-Enhanced Creativity: Work with our team to incorporate cutting-edge AI-generated visuals into your writing process. Don’t let writer’s block slow you down. Unlock the power of visual storytelling and take your writing to new heights. Explore our services today and turn your ideas into unforgettable stories!

Read more

AI Art for Writers

by Bill Tiepelman

AI Art for Writers

AI Art for Writers: Bridging the Gap Between Imagination and Reality Let’s face it: the life of a writer is equal parts inspiration and struggle. We have vivid worlds in our heads, but sometimes words alone don’t do them justice. That’s where AI art comes in—a tool that feels like it was pulled straight from a sci-fi novel. With just a few prompts, you can create visual representations of your characters, settings, and scenes. It’s like magic, but better—because it’s real and accessible to everyone. Whether you’re looking to clarify your vision, enhance your storytelling, or simply have fun experimenting, AI art is a game-changer for writers. Let’s explore how you can use it to bring your imagination to life. Why Writers Should Use AI Art AI art isn’t just a novelty; it’s a powerful tool for storytelling. Here’s why you should consider adding it to your creative arsenal: Visualize Characters: Struggling to pin down your protagonist’s look? Generate AI portraits to see them come to life. Build Your World: From alien landscapes to cozy villages, AI can create stunning visuals of your settings. Break Through Writer’s Block: Sometimes, seeing an image can spark new ideas or help you overcome creative slumps. Enhance Marketing: Use AI-generated art for promotional materials, social media, or even your book cover. Best of all, AI art tools are intuitive and easy to use, making them perfect for writers without any design experience. Step 1: Choose the Right Tool There are plenty of AI art platforms to choose from, each with its own strengths. Here are a few popular options: MidJourney: Known for its stunning, high-quality art that’s perfect for fantasy and sci-fi worlds. DALL-E: Great for generating custom visuals with specific details based on text prompts. Artbreeder: Ideal for creating character portraits by tweaking facial features and styles. Runway ML: A versatile platform that allows for more creative control and customization. Start by exploring free or trial versions to see which platform fits your needs and style. Step 2: Craft the Perfect Prompt AI art is only as good as the prompts you provide. Think of your prompt as the “script” for the AI, telling it what to create. Be specific, descriptive, and creative. For example: Instead of “a castle,” try: “A grand medieval castle surrounded by misty mountains, with glowing torches lighting the entrance.” Instead of “a hero,” try: “A rugged adventurer with a scar on his cheek, wearing a weathered leather coat, standing in front of a glowing blue portal.” Experiment with different prompts to fine-tune the results. Many platforms allow you to adjust elements like style, lighting, and mood. Step 3: Use AI Art for Character Design One of the most exciting applications of AI art is creating character visuals. Seeing your characters in the flesh (or pixels) can help you refine their personalities and quirks. Here’s how: Experiment with Details: Generate multiple versions of your character to explore different hairstyles, clothing, or expressions. Match Personality to Appearance: Use the visual to brainstorm traits. Does their sharp jawline reflect a tough attitude? Do their soft eyes hint at a hidden vulnerability? Create Group Dynamics: Visualize how your cast of characters looks together to ensure they’re distinct and cohesive. You can even use these visuals as references when describing your characters in your story. Step 4: Visualize Your Settings Whether it’s a sprawling desert, a futuristic cityscape, or a cozy cabin in the woods, AI art can bring your settings to life. Use these images to: Capture Atmosphere: Experiment with lighting, colors, and weather to set the tone for your scenes. Refine Descriptions: Use the visuals to add vivid details to your narrative, from the texture of the cobblestones to the way sunlight filters through the trees. Worldbuilding: Generate maps, landmarks, or unique cultural elements that deepen your world’s lore. Keep these images handy as inspiration while writing or revising. Step 5: Enhance Your Marketing AI art isn’t just for the writing process—it’s also a fantastic resource for promoting your work. Consider using AI-generated visuals for: Book Covers: Work with a designer to incorporate AI art into a professional cover design. Social Media: Share character portraits, scene visuals, or worldbuilding art to build excitement for your story. Extras for Readers: Offer bonus content like illustrated character cards or setting wallpapers to engage your audience. These visuals make your story stand out and create a more immersive experience for readers. Tips for Ethical AI Art Use As with any creative tool, it’s important to use AI art responsibly. Here are some tips: Respect Copyright: Ensure the platform you’re using allows for commercial use if you plan to monetize the visuals. Credit Where It’s Due: If you collaborate with a designer or use AI art in conjunction with other artwork, acknowledge all contributors. Be Transparent: Let your audience know when you’re using AI-generated visuals to manage expectations. By using AI art ethically, you can enjoy its benefits without stepping on anyone’s toes. Final Thoughts AI art is more than just a trend—it’s a revolutionary tool that can help writers bridge the gap between imagination and reality. Whether you’re creating character portraits, visualizing settings, or enhancing your marketing efforts, AI art opens up new creative possibilities. And the best part? It’s accessible, intuitive, and endlessly fun to explore. So why not give it a try? Your characters, worlds, and readers will thank you for it.     Turn Your Story Ideas into Stunning Visuals with Professional AI Art Why stop at imagining your characters and settings when you can see them brought to life? Whether you’re looking to refine your story, captivate readers, or elevate your marketing materials, AI art combined with expert design can transform your storytelling process. At Unfocussed Photography and Imaging, we specialize in blending AI-generated visuals with professional artistry to create images that truly capture the heart of your narrative. From dynamic character portraits to immersive settings, let’s make your story unforgettable. Custom Character Design: Work with our team to develop stunning AI-enhanced visuals of your characters. Worldbuilding Art: Bring your settings to life with breathtaking landscapes, detailed maps, and more. Marketing and Promotion: Use bespoke visuals for book covers, social media, and promotional campaigns. Your story deserves to stand out—let us help you turn your creative vision into reality. Explore our services today and take your storytelling to the next level!

Read more

Color Palettes for Writing

by Bill Tiepelman

Color Palettes for Writing

Color Palettes for Writing: Yes, It’s a Thing As writers, we often think of storytelling in terms of words, sentences, and structure. But here’s a little-known secret: color can be just as powerful a tool for shaping your story. From setting the mood to representing characters, color palettes are a fun and creative way to enhance your writing process. And no, you don’t need to be an artist or designer to use them effectively. Let’s explore how thinking in color can open up new dimensions in your storytelling and give you practical ways to incorporate color palettes into your writing process. Why Color Palettes Matter Color is deeply tied to emotion and symbolism. When you think of red, you might feel passion or danger. Blue? Calm or sadness. These associations aren’t just cultural—they’re universal. Incorporating color palettes into your writing allows you to: Set the Mood: Use colors to influence the tone of a scene or chapter. Enhance Worldbuilding: Assign specific palettes to settings or cultures to make them more immersive. Define Characters: Associate characters with particular colors to reflect their personalities or arcs. Visualize Your Story: Create a cohesive “look” for your narrative, which is especially useful for marketing or adaptation purposes. Step 1: Start with Your Story’s Themes Before diving into colors, think about the overall themes and emotions of your story. Is it a dark thriller with undertones of tension and fear? A whimsical fantasy full of wonder and magic? A heartfelt romance steeped in warmth and intimacy? Your story’s themes will guide your choice of color palettes. For example: Thriller: Dark tones like black, deep red, and steel gray can evoke danger and mystery. Fantasy: Vibrant greens, golds, and purples can create a sense of magic and adventure. Romance: Soft pinks, warm reds, and creamy whites can convey love and intimacy. Jot down a few words that describe your story’s essence. These will serve as your “color keywords.” Step 2: Build Palettes for Settings Settings play a huge role in storytelling, and giving each location its own color palette can make it feel distinct. Think about how real-life places have unique vibes: the golden glow of a beach at sunset versus the muted grays of a rainy city. Capture that same energy in your writing. For example: The Enchanted Forest: Emerald greens, earthy browns, and glowing golds. The Villain’s Lair: Deep purples, harsh blacks, and flickering oranges. The Small-Town Café: Warm yellows, soft blues, and pops of red from vintage decor. You can even use online tools like Coolors or Adobe Color to generate palettes that match your vision. Save them as references to keep your descriptions consistent. Step 3: Assign Colors to Characters Color is a fantastic way to define characters and give them visual identities, even if they only exist on the page. Ask yourself: What’s their dominant personality trait? (A fiery character might be associated with red.) How do they evolve? (A timid character’s palette might shift from soft pastels to bold, confident tones.) Do they have signature items or clothing? (A villain’s blood-red cape or a hero’s golden shield.) For example, you might assign: The Hero: Crisp blues and whites for purity and hope. The Love Interest: Warm peaches and soft pinks for affection and charm. The Antagonist: Smoky grays and sharp reds for menace and danger. These colors can inform your descriptions, helping readers form vivid mental images of your characters. Step 4: Use Colors to Set the Mood Colors are a shortcut to emotion. If you’re writing a tense scene, think about how dark, shadowy colors might reflect that unease. If it’s a joyous moment, consider the bright, lively tones of a festival or a sunny meadow. Here’s how colors can influence mood: Sadness: Muted blues and grays create a sense of melancholy. Happiness: Bright yellows and greens evoke energy and optimism. Fear: Deep blacks and sickly greens add tension and dread. When describing a scene, keep your palette in mind. You don’t have to explicitly mention colors, but you can use them subtly through objects, lighting, or atmosphere. Step 5: Create a Visual Reference Once you’ve chosen your palettes, consider creating a visual reference for yourself. This could be a simple mood board with images and colors that capture your story’s vibe. Tools like Canva, Pinterest, or even physical collages are great for this. For instance, if your story is set in a coastal town, your reference might include photos of sandy beaches, pastel houses, and ocean waves in varying shades of blue and green. Refer back to it whenever you’re writing to keep the atmosphere consistent. Step 6: Incorporate Colors into Marketing If you’re planning to publish your story, your color palettes can extend beyond the page. Use them for your book cover, social media graphics, and promotional materials to create a cohesive brand for your story. Readers will start to associate those colors with your work, making it more memorable. Final Thoughts Color palettes might seem like an unconventional tool for writers, but they’re a powerful way to enhance your storytelling. From creating vivid settings to defining characters and setting the mood, thinking in color can unlock new creative possibilities. So go ahead—think outside the box, experiment with color, and watch your story come to life in ways you never imagined.     Bring Your Story’s Colors to Life with Professional Design Color isn’t just a tool for writing—it’s a gateway to creating a vivid, immersive world that captivates readers. Imagine using carefully crafted color palettes to shape your narrative and enhance your book’s visual appeal. Whether you’re designing a cover, developing marketing materials, or creating a mood board for inspiration, we’re here to help! At Unfocussed Photography and Imaging, we specialize in turning your story’s essence into stunning visuals that bring your work to life. Let’s collaborate to create colors that inspire your words and resonate with your audience. Custom Color Palettes: Work with our experts to develop palettes tailored to your story’s themes and tone. Visual Story Design: Elevate your project with cohesive graphics and visuals inspired by your narrative. Marketing Integration: Use your color palettes to design book covers, promotional materials, and social media content. Your story deserves colors that speak as powerfully as your words. Let’s create something unforgettable together. Explore our services today and bring your storytelling to a whole new level!

Read more

DIY Mapmaking for Fantasy Worlds

by Bill Tiepelman

DIY Mapmaking for Fantasy Worlds

DIY Mapmaking for Fantasy Worlds: Why It’s Fun and How to Get Started Maps are the unsung heroes of fantasy and sci-fi storytelling. They ground your readers in your world, provide context for epic journeys, and bring a sense of realism to even the most fantastical settings. But maps aren’t just for readers—they’re a powerful tool for you, the writer. They help you visualize your world, keep track of details, and even spark new story ideas. The best part? You don’t need to be a cartographer to make one. Whether you’re sketching with a pencil or using a fancy digital tool, mapmaking is an accessible and fun way to deepen your connection with your world. Let’s dive into why you should create a map for your story and how to get started. Why Writers Should Make Maps Creating a map isn’t just about aesthetics—it’s about enhancing your storytelling process. Here’s how a map can help you as a writer: Organize Your World: Whether your story spans kingdoms, planets, or a single town, a map helps you keep track of locations, distances, and relationships. Enhance Plot Development: Seeing your world laid out visually can spark ideas for journeys, conflicts, and connections you hadn’t considered before. Add Depth to Your Worldbuilding: A map makes your world feel more real, encouraging you to think about geography, culture, and history. Immersive Reader Experience: Including a map in your book helps readers feel connected to your world from the very first page. Still on the fence? Remember: your map doesn’t have to be perfect. It just has to make sense for your story. Step 1: Start with Your Story Before you grab your tools, think about your story’s needs. What role does geography play in your narrative? For example: Does your hero have to cross dangerous mountains or navigate treacherous seas? Are different regions or kingdoms at war? Does your world include unique landmarks, like floating islands or ancient ruins? Your map should serve the story, so let your plot guide its design. Step 2: Gather Inspiration If you’re unsure where to begin, look to other maps for inspiration. Study classic examples like Tolkien’s Middle-earth or modern ones like the maps in A Song of Ice and Fire. Notice how they balance practical details (roads, cities, rivers) with creative flair (mysterious forests, magical landmarks). You can also draw inspiration from real-world geography. Flip through atlases or explore Google Earth to see how natural features like mountains, rivers, and deserts shape human settlements and travel routes. Step 3: Choose Your Tools There are plenty of ways to create a map, from old-school pencil and paper to high-tech digital tools. Here are some options: Hand-Drawn Maps: Grab a piece of paper, a pencil, and maybe some colored markers. This method is simple, tactile, and great for brainstorming. Digital Tools: Platforms like Inkarnate, Wonderdraft, and Campaign Cartographer are designed for mapmaking and offer tons of customization options. Hybrid Approach: Sketch your map by hand, then scan it and refine it using digital tools like Photoshop or GIMP. Experiment with different methods to find what works best for you. Step 4: Start Sketching Begin with the basics: draw the outline of your world. Is it a single continent, an archipelago, or an entire planet? Don’t worry about precision—just get the general shape down. Next, add major geographical features like mountains, rivers, and forests. These elements will influence where settlements are located and how characters travel. After that, mark key locations like cities, towns, and landmarks. Finally, think about how these features interact. For example: Rivers often flow from mountains to the sea, and towns tend to spring up near water sources. Forests might be home to mysterious creatures, while deserts could hide ancient ruins. Trade routes might connect cities, while natural barriers like mountains create political divides. Step 5: Add Creative Flair This is where the fun begins. Your map doesn’t just have to be functional—it can also be beautiful and filled with personality. Consider adding: Unique names for regions, landmarks, and cities (bonus points for names that reflect the culture or history of the area). Symbols or icons for different types of locations (e.g., castles, ruins, mines). Annotations or notes about key areas (“Cursed Forest—Do Not Enter!”). Don’t be afraid to lean into the fantastical. Floating islands, hidden caves, and magical anomalies can make your map feel alive and unique. Step 6: Refine and Use Your Map Once your map is complete, it’s time to put it to work. Use it as a reference while writing to keep your story consistent. For example: Check travel times and distances to ensure characters aren’t teleporting from one side of the map to the other (unless, of course, magic is involved). Use the map to plot journeys, battles, or escape routes. Let the geography inspire new storylines. Maybe your characters discover an uncharted island or explore a forbidden mountain pass. If you’re publishing your book, consider including the map as a frontispiece or bonus material. Readers love poring over maps to get a deeper understanding of the world. Why Mapmaking Is Worth It Creating a map isn’t just a practical exercise—it’s a chance to deepen your connection to your story. It forces you to think about your world in new ways, from the flow of rivers to the rise and fall of empires. And let’s be honest: there’s something incredibly satisfying about seeing your world take shape on paper (or screen). So grab your tools, let your imagination run wild, and start charting your world. Who knows? You might just discover a hidden story waiting to be told.     Bring Your Fantasy World to Life with Professional Maps Creating a fantasy map isn’t just about sketching locations—it’s about crafting a visual masterpiece that immerses your readers and enhances your storytelling. Whether you’re writing an epic fantasy, a sprawling sci-fi saga, or a richly detailed RPG campaign, a professionally designed map can elevate your worldbuilding to new heights. At Unfocussed Photography and Imaging, we specialize in creating bespoke maps that bring your imagination to life. Let’s work together to design a map that captures the unique essence of your story. Custom Fantasy Maps: Collaborate with our designers to create hand-drawn or digital maps tailored to your world. Interactive Map Design: Enhance your storytelling with clickable maps for digital platforms. Worldbuilding Support: Refine your map’s geography, history, and aesthetics with our expert guidance. Your story deserves a map that’s as detailed and vibrant as your narrative. Let us help you turn your vision into reality. Explore our map design services today and make your world unforgettable!

Read more

Turning Scenes Into Storyboards

by Bill Tiepelman

Turning Scenes Into Storyboards

Turning Scenes Into Storyboards: A Secret Weapon for Writers As writers, we often see our stories play out like movies in our minds. But when it comes time to put those cinematic moments into words, the details can get fuzzy, pacing might falter, and the emotional impact doesn’t always hit the way it should. That’s where storyboarding comes in. While it’s traditionally a tool for filmmakers, storyboarding can be a game-changer for writers, helping you visualize key scenes, refine pacing, and even uncover hidden layers of your narrative. So, what exactly is storyboarding for writers, and how can you use it to elevate your storytelling? Let’s dive in. What Is Storyboarding for Writers? At its core, storyboarding is a visual representation of your story, broken down into panels or frames that depict the sequence of events. Think of it as creating a comic strip version of your scenes, where each panel represents a moment in time. While filmmakers use it to plan camera angles and movement, writers can use it to map out action, dialogue, and even emotional beats in a scene. The best part? You don’t need to be an artist to create a storyboard. Stick figures, rough sketches, or even a series of descriptive captions can work wonders. Why Writers Should Use Storyboards Storyboarding might sound like extra work, but trust me, it’s worth it. Here’s how it can transform your writing process: Clarify Pacing: Seeing a scene laid out visually helps you identify if events are unfolding too quickly or dragging on too long. Enhance Visual Details: Storyboarding forces you to think about the physical space, character movements, and visual elements in your scenes. Identify Plot Holes: By mapping out a sequence of events, you’ll quickly spot gaps or inconsistencies in the narrative. Strengthen Emotional Impact: Visualizing characters’ expressions and body language can help you write more powerful emotional beats. Step 1: Choose a Scene to Storyboard Start small. Pick a pivotal scene—maybe it’s a dramatic confrontation, a chase sequence, or a tender moment of connection. This could be a scene you’re struggling to write or one that’s crucial to your story’s arc. For example, if you’re working on a high-stakes action scene, storyboarding can help you track the physical movements of characters, making the sequence feel more dynamic and realistic. Step 2: Break It Down Into Beats Every scene has beats—key moments or actions that drive the narrative forward. Before sketching or drafting your storyboard, write down these beats. For instance, in a confrontation scene, the beats might include: The characters enter the room and size each other up. The protagonist makes an accusation. The antagonist deflects, revealing new information. The conversation escalates into a heated argument. The antagonist storms out, leaving the protagonist reeling. Breaking the scene into beats ensures you don’t miss any critical moments when storyboarding. Step 3: Create Your Panels Now it’s time to bring the scene to life. Draw a series of panels on a sheet of paper or use digital tools like Canva or Storyboard That. Each panel should represent one beat or moment in the scene. For writers who aren’t comfortable drawing, don’t worry! Stick figures, arrows, and descriptive captions are more than enough to communicate what’s happening. The goal isn’t artistry—it’s clarity. Step 4: Add Details As you fill in your panels, think about the details: Character Placement: Where are your characters standing? Are they close together or far apart? Are they sitting or moving? Facial Expressions: What emotions are they feeling, and how can you show that visually? Environment: What does the setting look like? Are there props or elements in the background that add to the scene’s mood? These details will help you bring the scene to life in your writing, making it more vivid and immersive for readers. Step 5: Analyze and Adjust Once your storyboard is complete, step back and look at the sequence as a whole. Ask yourself: Does the scene flow logically from one moment to the next? Are the pacing and rhythm satisfying? Do the visuals match the tone and emotion of the scene? If something feels off, adjust your panels until everything clicks. Then, use your storyboard as a guide while writing or revising the scene. Going Beyond Individual Scenes Once you’ve mastered storyboarding for single scenes, try using it for larger sections of your story or even the entire plot. Visualizing your narrative arc can help you spot patterns, themes, and pacing issues across the story as a whole. For example, you might storyboard a series of connected scenes to ensure they flow smoothly or map out a complex climax to keep track of multiple characters and events. Tools and Resources for Storyboarding If you’re ready to give storyboarding a try, here are some tools to get you started: Pen and Paper: The simplest and most accessible method. Grab a notebook and start sketching! Digital Tools: Canva, Storyboard That, and Adobe Spark offer templates and easy-to-use interfaces for digital storyboarding. AI Tools: Platforms like DALL-E or Artbreeder can help you generate quick visuals to include in your panels. Final Thoughts Storyboarding isn’t just for filmmakers—it’s a versatile and powerful tool for writers. Whether you’re mapping out an action-packed chase or an emotionally charged dialogue, storyboarding can help you visualize, refine, and elevate your scenes. And the best part? You don’t need artistic talent to make it work. So grab your pen, your laptop, or whatever tools you have on hand, and start turning your scenes into storyboards. Your story will thank you for it.     Visualize Your Story Like Never Before Storyboarding isn’t just for filmmakers—it’s a powerful tool for writers to bring their scenes to life. But what if you could take your storyboarding to the next level with professional-quality visuals and expert guidance? At Unfocussed Photography and Imaging, we offer services tailored to writers looking to enhance their storytelling process. Whether you’re outlining scenes, refining pacing, or creating visuals for pitches and promotions, we’re here to help. Custom Storyboard Design: Collaborate with us to create detailed, visually stunning storyboards for your key scenes or entire narrative. Scene Concept Visualizations: Translate your ideas into polished, professional artwork that captures the essence of your story. Character and Setting Sketches: Add depth to your world-building with bespoke illustrations of your story’s key elements. Bring your story to life with visuals that resonate and captivate. Let’s make your vision a reality. Explore our services today and take your storytelling to new heights!

Read more

Cover Art That Captures Your Story’s Soul

by Bill Tiepelman

Cover Art That Captures Your Story’s Soul

We’ve all heard the saying: “Don’t judge a book by its cover.” But let’s be real—everyone does. In today’s crowded literary world, your book’s cover is often the first thing a reader sees, and it can make or break their decision to pick it up. It’s not just a design—it’s a promise, a visual invitation into the world you’ve created. But how do you ensure your cover art captures the soul of your story while standing out in the sea of other books? Let’s break it down step-by-step, and spoiler alert: you don’t need to be a design expert to get this right. You just need a clear vision and the right tools or collaborators to bring it to life. Why Cover Art Matters Your cover isn’t just decoration—it’s a marketing tool, a story teaser, and a mood-setter all rolled into one. A great cover tells potential readers what they can expect: Is it a heart-pounding thriller? A whimsical fantasy? A gut-wrenching romance? It also gives a glimpse of your story’s tone and themes, pulling readers in before they’ve even flipped to the blurb. But here’s the kicker: the best cover art doesn’t just reflect your story—it evokes curiosity. It makes people stop, take a second look, and think, I need to know what this is about. Step 1: Define Your Vision Before you dive into the world of design, get crystal clear on what your book is about and how you want it to feel. Ask yourself: What genre does my book fall into? (This affects everything from colors to font choices.) What’s the mood or tone of my story? (Dark and suspenseful? Bright and adventurous?) What’s a key element or theme that I want the cover to highlight? (A character, a setting, a symbol?) If you’re feeling stuck, think about covers from books you admire. What drew you to them? What made them memorable? You’re not looking to copy—you’re looking for inspiration to guide your vision. Step 2: Consider Your Audience Your cover doesn’t just need to reflect your story; it needs to resonate with your readers. Different genres and audiences have specific visual expectations. For example: Romance: Often features soft colors, intimate poses, or bold typography depending on the subgenre. Fantasy: Might showcase intricate landscapes, magical objects, or dramatic lighting. Thriller: Dark colors, stark contrasts, and minimalist designs evoke suspense and tension. Look at bestsellers in your genre to get a sense of the visual language your audience expects. Then, think about how you can add your unique twist to stand out. Step 3: Decide on DIY or Hiring a Designer If you’re design-savvy or working with a tight budget, creating your own cover might be the way to go. Platforms like Canva and Adobe Spark offer user-friendly tools for creating professional-looking designs without breaking the bank. Just make sure you invest in high-quality images and fonts to avoid that dreaded “amateur” look. If design isn’t your forte (or you want something truly polished), hiring a professional is worth every penny. Sites like 99designs, Reedsy, and Fiverr connect you with talented designers who specialize in book covers. Be prepared to share your vision, genre, and key elements with them to ensure they capture your story’s essence. Step 4: Play with Elements Whether you’re designing the cover yourself or working with a professional, understanding the key elements of cover art will help you make informed decisions. Here’s what to consider: Typography: The font you choose can speak volumes. Serif fonts (like Times New Roman) often feel classic and sophisticated, while sans-serif fonts (like Arial) can feel modern and clean. Script fonts add elegance, but use them sparingly! Colors: Different colors evoke different emotions. Warm tones like red and orange can feel passionate or urgent, while cool tones like blue and green often feel calm or mysterious. Imagery: What’s the focal point of your cover? A striking character? A haunting landscape? Choose imagery that supports your story’s themes without overwhelming the design. Negative Space: Don’t be afraid of simplicity. Sometimes, less is more, and a minimalist design can make your book stand out in a cluttered market. Step 5: Test and Refine Think you’ve nailed your design? Great—but don’t stop there. Share your cover with a trusted group of beta readers, fellow writers, or even potential readers in your target audience. Ask for feedback: Does this cover make you want to pick up the book? Does it align with the genre and tone? What stands out the most (for better or worse)? Be open to critique, but also trust your instincts. At the end of the day, it’s your story—and your cover should feel true to it. When Great Cover Art Becomes a Marketing Powerhouse Your cover is just the beginning. Use it as a cornerstone of your marketing efforts. Share behind-the-scenes looks at the design process on social media, create matching banners for your website, and use the cover’s colors and themes in your promotional materials. The more cohesive your branding, the more professional and memorable your book will appear. Final Thoughts Cover art isn’t just about making something pretty—it’s about creating a visual doorway into your story, a first impression that lingers long after the reader walks away. Whether you go DIY or hire a pro, take the time to craft a cover that not only captures your story’s soul but also draws readers in. Your story deserves a cover that does it justice. So go ahead—dream big, experiment boldly, and create a visual masterpiece that’s as compelling as the words inside.     Transform Your Story with Stunning Professional Cover Art Your book’s cover is the gateway to your story—a powerful tool that draws readers in and sets the tone for what’s inside. Whether you’re preparing for self-publishing, submitting to agents, or building a marketing campaign, a professionally designed cover can make all the difference. At Unfocussed Photography and Imaging, we specialize in creating bespoke cover art that captures the essence of your story and stands out in today’s competitive market. Let’s bring your vision to life with personalized designs tailored to your genre, audience, and unique narrative. Custom Cover Design: Collaborate with our expert designers to create an unforgettable cover that reflects your story’s soul. Genre-Specific Artwork: From bold and dramatic to whimsical and romantic, we craft visuals that resonate with your audience. Complete Branding Packages: Elevate your promotional materials with matching banners, social media graphics, and more. Don’t let your story go unnoticed. Partner with us to ensure your cover makes a lasting impression. Explore our services today and give your book the cover it deserves!

Read more

Mood Boards Aren’t Just for Pinterest

by Bill Tiepelman

Mood Boards Aren’t Just for Pinterest

Mood Boards Aren’t Just for Pinterest: Visualizing Your World If you’re thinking, “Mood boards are for designers, not writers,” let me stop you right there. Mood boards are a powerhouse tool for anyone looking to bring a creative vision to life—including us wordsmiths. Think of them as a visual playground for your story, a way to map out your characters, settings, and themes beyond the written word. And here’s the best part: creating a mood board is ridiculously fun. It’s like piecing together a puzzle made entirely of inspiration. Why Writers Should Use Mood Boards As writers, we often live in our heads. We see our characters, settings, and plots vividly, but translating that into words isn’t always easy. That’s where mood boards come in. They help you externalize your ideas, giving you a tangible reference point that makes your story feel real. Imagine you’re building a fantasy world. Sure, you can describe it in intricate detail, but wouldn’t it be helpful to have a visual guide—a mix of images that capture the architecture, landscapes, and vibe of your world? Or maybe you’re writing a contemporary romance and want to get the tone just right. A mood board filled with soft lighting, cozy coffee shops, and heartwarming color palettes can act as a north star for your writing. Step 1: Define Your Focus Before diving in, decide what your mood board will focus on. Is it for a specific character? A setting? The overall tone of your story? For example: Character Mood Boards: Include fashion styles, facial expressions, hairstyles, and even symbolic objects that represent your character. Setting Mood Boards: Gather images of landscapes, architecture, weather patterns, and interior designs that define your story’s locations. Tone and Theme Boards: Use colors, abstract art, and textures to convey the emotional heartbeat of your story. Having a clear focus will prevent you from spiraling into “Pinterest overload,” where you save every image that catches your eye but end up with a chaotic jumble of unrelated visuals. Step 2: Gather Your Materials The beauty of mood boards is that they can be physical or digital. Choose what works best for you: Physical Mood Boards: Use magazines, newspapers, photographs, fabric swatches, and even found objects. Pin them to a corkboard or collage them into a notebook. Digital Mood Boards: Platforms like Pinterest, Canva, and Milanote make it easy to curate and organize your visuals. Simply drag and drop images into a cohesive layout. Don’t be afraid to mix and match mediums! A physical mood board next to a digital one can give you the best of both worlds. Step 3: Curate, Don’t Collect Here’s a mistake I’ve made more times than I’d like to admit: collecting every vaguely interesting image without a clear idea of how it fits. Mood boards work best when they’re curated. Each image should serve a purpose, whether it’s capturing a specific detail (like your protagonist’s favorite leather jacket) or setting the emotional tone (like a stormy seascape for a pivotal scene). A good rule of thumb is to start broad and then refine. Gather lots of inspiration first, but as your vision becomes clearer, weed out the extras. Think of it like editing a first draft—cut ruthlessly until only the essentials remain. Step 4: Organize for Impact The layout of your mood board matters. Group similar elements together to create a sense of cohesion. For example: Characters: Cluster all character references in one section—faces, clothing, and personality traits. Settings: Dedicate another section to landscapes, architecture, and key objects. Tone: Use colors and abstract elements to tie everything together. This level of organization doesn’t just make your mood board visually appealing; it also makes it easier to use as a writing reference. Step 5: Let Your Mood Board Evolve Your story will change as you write it, and your mood board should evolve along with it. Don’t be afraid to swap out images or add new ones as your vision becomes clearer. A mood board is a living document—a visual reflection of your creative process. How Mood Boards Enhance Your Writing Let’s talk about the magic that happens when you use a mood board effectively. For me, it’s like having a cheat sheet for immersion. Stuck describing a room? Glance at your mood board and let the details flow. Unsure how your protagonist would dress for a date? That outfit you pinned three weeks ago might hold the answer. The visuals become touchstones that ground your writing and spark new ideas. Mood boards are also incredible for maintaining consistency. If you’re writing a sprawling novel with multiple settings and characters, it’s easy to lose track of the details. A mood board keeps everything in one place, making it your go-to resource for staying true to your vision. When to Use Your Mood Board Here are some ways to integrate your mood board into your writing process: Pre-Writing: Use it to brainstorm and solidify your story’s tone and direction. During Writing: Refer to it whenever you’re stuck or need a burst of inspiration. Revisions: Check your finished scenes against your mood board to ensure they align with your original vision. Mood Boards Aren’t Just a Tool—They’re a Journey Here’s the thing about mood boards: they’re more than a collection of pretty pictures. They’re a journey into the heart of your story, a chance to explore its nuances and bring its details into focus. And, let’s be real—they’re just plain fun to make. So grab your scissors, fire up Pinterest, or open a blank Canva template. Your story deserves a visual guide—and trust me, once you start, you’ll wonder how you ever wrote without one.     Bring Your Creative Vision to Life with Professional Visuals Creating a mood board is just the beginning of visualizing your story. What if you could take those ideas and turn them into high-quality visuals that capture the true essence of your characters, settings, and themes? That’s where we come in! At Unfocussed Photography and Imaging, we specialize in helping writers transform their creative ideas into stunning, professional visuals. Whether you’re preparing promotional materials, crafting an immersive book cover, or just need a clear visual reference for your story, we’ve got you covered. Custom Mood Board Design: Work with our team to expand your mood boards into cohesive visual guides that inspire your writing and storytelling. Character and Setting Illustrations: Bring your protagonists, antagonists, and worlds to life with personalized, detailed illustrations. Story Concept Visualization: Translate your ideas into polished images that reflect the heart of your narrative. With our creative services, you don’t just imagine your story—you see it. Ready to bring your ideas to life? Explore our creative services now and take your storytelling to the next level!

Read more

Sketching Your Characters: No Artistic Talent Required

by Bill Tiepelman

Sketching Your Characters: No Artistic Talent Required

Let’s be honest: if you’re anything like me, the thought of sketching your characters might feel about as realistic as painting the Mona Lisa blindfolded. I mean, isn’t that why we’re writers? Words are our medium; we paint with sentences, not brushstrokes. But here’s the thing: creating even the roughest visual representation of your characters can unlock a whole new level of creativity in your writing. And guess what? You don’t need to be a professional artist—or even a passable doodler—to do it. Why Sketching Characters Helps Writers Characters are complex. They live and breathe in our imaginations, but when it comes to describing them on the page, suddenly they become elusive. Is their nose sharp or button-like? Do they slouch or stand with military precision? Sketching—even in its simplest form—forces you to answer these questions. It’s not just about what they look like; it’s about discovering who they are. I’ll never forget the first time I attempted to draw a protagonist. Let’s just say my “art” wouldn’t earn me a gold star in kindergarten. But seeing their face—even a lopsided, cartoonish version—sparked something unexpected. I started thinking about how they’d react to a stranger, what kind of energy they exuded, even how they might walk into a room. Sketching turned out to be a brainstorming tool in disguise. No Talent? No Problem. Here’s the good news: your sketches are just for you. Nobody’s grading you, and you don’t have to show them to anyone (unless you want to). The goal isn’t perfection; it’s connection. If picking up a pencil sounds daunting, here are some no-skill-required ways to create character visuals: Stick Figures Are Your Friends: Start simple. A stick figure with a scruffy beard or oversized glasses can convey a lot. Add basic details like a hat, hairstyle, or posture to start giving your character personality. Collage It: If drawing isn’t your thing, try cutting and pasting. Grab magazines or printouts of faces and features that remind you of your character. Frankenstein them together on a piece of paper for a collage that captures their essence. Use Free Drawing Tools: Apps like Sketchpad or Procreate (on beginner settings) make it easy to experiment with digital sketches. Plus, there’s an undo button for when things inevitably go wrong. Turn to AI Generators: Tools like Artbreeder and Character Creator let you craft faces with sliders and presets. While it’s not technically sketching, it’s still creating a visual touchstone for your character. The Power of Visual Detail Once you have even a crude visual of your character, you’ll notice how much it influences your writing. For example, I once drew a secondary character I hadn’t thought much about—just a quick doodle of a lanky figure with messy hair. Suddenly, I realized they’d likely have a nervous energy, constantly fidgeting with their sleeves or standing too close to people. The sketch didn’t just capture their look; it unlocked their personality. Think of sketching as an extension of character profiling. It’s one thing to know your character is “intense” or “quirky.” It’s another to picture how their intensity shows up in a scowl or how their quirkiness shines through their colorful, mismatched socks. What About Settings and Props? Don’t stop at faces and figures. Sketching can also help flesh out your characters’ worlds. Does your protagonist’s bedroom look meticulously tidy or like a hurricane just blew through? What does their favorite coffee mug look like? These details might seem small, but they build immersion for both you and your readers. Let It Be Fun If you’re still feeling hesitant, remind yourself that this is supposed to be fun. Grab some crayons, doodle with your kids, or challenge yourself to a one-minute sketching spree. The sillier you let it be, the more enjoyable the process becomes. It’s not about nailing proportions or perfect shading—it’s about unlocking new insights into your characters. When to Bring in the Pros Once you’ve got a rough idea of what your characters look like, you might consider commissioning an artist. Sites like Fiverr or DeviantArt have countless talented artists who can turn your stick figure masterpiece into something professional. Having polished character art can be a great resource for marketing, book covers, or just motivation to finish your draft. The Magic of Seeing Your Character At the end of the day, seeing your character—even if it’s a stick figure with a smiley face—makes them feel more real. It’s a reminder that your characters aren’t just words on a page; they’re people with depth, flaws, and stories to tell. And sometimes, all it takes is a pencil (or a poorly drawn beard) to breathe life into them. So grab your tools—pencil, tablet, or even a napkin—and start sketching. Your characters are waiting to be seen.     Bring Your Characters to Life with Professional Visuals Imagine your characters not just in words, but in vivid, professionally crafted visuals that truly capture their essence. Whether you’re looking to enhance your story development process or create stunning promotional materials, our creative services can help you take your characters to the next level. At Unfocussed Photography and Imaging, we specialize in transforming ideas into captivating imagery. From detailed character illustrations to immersive storyboarding, we’ll ensure your vision is brought to life with precision and artistry. Custom Character Sketches: Collaborate with our team to create personalized illustrations that align with your narrative vision. Storyboarding Services: Visualize key scenes from your story with dynamic, professional-quality storyboards. Promotional Artwork: Enhance your book cover or marketing campaign with custom-designed visuals that stand out. Ready to see your characters in a whole new light? Explore our creative services today and bring your imagination to life.

Read more

Developing Characters: Breathing Life Into Your Stories

by Bill Tiepelman

Developing Characters: Breathing Life Into Your Stories

Every great story begins with its characters. Whether they’re heroic, flawed, enigmatic, or downright villainous, characters are the heart of any narrative. But creating characters that feel real and unforgettable? That’s an art form in itself. Let’s dive into how you can develop compelling characters that leap off the page and stay with your readers long after they close the book. 1. Start With the Basics: Who Are They? Before you can add depth, start with the essentials. What’s your character’s name? Age? Appearance? Occupation? These might seem like small details, but they’re the building blocks of your character’s identity. If you’re stuck, try visualizing them in a specific moment—like what they’d order at a coffee shop or how they’d dress for a job interview. 2. Dig Into Their Backstory Every character comes from somewhere, and their past shapes their present. Were they raised in a bustling city or a quiet countryside? Did they have a happy childhood, or are they haunted by past trauma? Even if these details don’t make it into the story, knowing them gives you a deeper understanding of your character’s motivations and fears. 3. Define Their Goals and Conflicts What does your character want? And what’s standing in their way? Characters without goals feel aimless, and conflicts are what drive the story forward. Maybe your protagonist is chasing a dream job, but their self-doubt keeps sabotaging them. Or perhaps your antagonist wants power, but their own hubris becomes their downfall. 4. Develop Their Flaws No one’s perfect—especially not your characters. Flaws make characters relatable and human. Maybe your hero is brave but reckless, or your love interest is charming but commitment-phobic. The key is balance: flaws shouldn’t overshadow the character’s redeeming qualities, but they should create opportunities for growth. 5. Give Them a Unique Voice Dialogue is where your characters truly come alive. Think about how they speak: are they formal or casual? Do they have a regional accent, favorite phrases, or a sarcastic streak? A character’s voice should reflect their personality, background, and emotions. 6. Test Them in Action Characters reveal themselves through their choices. Put them in challenging situations and see how they respond. How does your protagonist react to betrayal? What does your antagonist do when they finally get what they want? Action reveals character more vividly than any description ever could. 7. Evolve Them Over Time Dynamic characters grow and change as the story unfolds. Maybe they overcome a fear, reconcile with their past, or realize a truth about themselves. A character arc is what makes readers root for your characters and feel invested in their journey. 8. Surround Them With Complexity Remember, characters don’t exist in a vacuum. Their relationships with other characters add layers to their personality. How do they interact with a mentor, rival, or love interest? Do they have a sidekick who challenges their decisions or a family member who supports them unconditionally? 9. Keep a Character Bible As your story grows, it’s easy to lose track of details. A character bible—a document with everything from their favorite color to their most embarrassing memory—keeps your characters consistent and helps you build a rich, interconnected world. 10. Trust Your Instincts Finally, remember that your characters are a reflection of you. Trust your instincts, take risks, and let them surprise you. Sometimes, the most compelling characters are the ones who break the rules and defy expectations. Your characters are the soul of your story. Treat them with care, and they’ll reward you by captivating your readers, one page at a time.     Character Development Checklist for Authors Before you wrap up your character creation process, use this handy checklist to ensure your characters are well-rounded and ready to captivate your readers: Basic Details: Name, age, appearance, occupation, and key identifiers are clear and consistent. Backstory: Your character’s past, motivations, and significant life events are fleshed out. Goals and Conflicts: Their desires, fears, and obstacles are well-defined and tied to the story’s plot. Flaws and Strengths: Balanced traits make your character relatable and human. Voice: Dialogue and inner thoughts reflect their personality and background. Relationships: Interactions with other characters reveal depth and complexity. Actions and Choices: Their decisions drive the story and reveal who they are. Character Arc: Their growth or change over the course of the story is clear and impactful. Consistency: Key details and behaviors remain consistent throughout the story. Unique Factor: Your character has something memorable or distinct that sets them apart. Keep this checklist by your side as you write, and your characters will become unforgettable pillars of your story.

Read more

Personal Style Evolution

by Bill Tiepelman

Personal Style Evolution

Personal Style Evolution: The Wild, Winding Road to Finding Your Creative Identity Let’s get something out of the way: finding your personal creative style isn’t some neat, linear journey. It’s messy, thrilling, and often downright confusing. One day, you’re convinced you’re the next minimalist design savant; the next, you’re smearing neon colors on a canvas like a kid who discovered finger paints. That’s the magic, though, isn’t it? It’s a chaotic love affair with creativity, and every misstep, experiment, and breakthrough becomes part of your story. The Spark That Ignites It All Everyone starts somewhere. For me, it was staring at a painting by an artist I idolized, thinking, “I wish I could do that.” Those initial sparks of inspiration are intoxicating. Maybe it’s a photograph, a song, or even the way light falls on your morning coffee. At first, your work might look like a cheap knockoff of your idols—and that’s okay. All the greats started by mimicking someone else. Imitation isn’t failure; it’s training wheels. Experimenting: Permission to Be Terrible Here’s the thing about experimentation: it’s messy, and most of it won’t be good. But bad art is a rite of passage. It’s the price you pay to discover what works for you. For years, I thought I’d be a watercolor painter. Spoiler: I’m terrible at it. But those clumsy watercolors taught me about layering and patience, lessons I carried into my digital work. So pick up a medium you’ve never tried, tackle subjects that scare you, and allow yourself to fail spectacularly. Every experiment is a breadcrumb on the trail to your style. Consistency: Repetition Is Boring, but It Works Once you stumble upon something that feels right, it’s time to lean in. I know, repetition sounds like the antithesis of creativity, but consistency is what sharpens your skills and polishes your voice. It’s like learning to play guitar: at first, you just want to shred solos, but it’s the endless practice of chords and scales that turns noise into music. Similarly, returning to themes, colors, or techniques you love will transform them into signature elements of your style. The “I’m Stuck” Phase (Spoiler: You’re Not) Every creative hits that moment where nothing feels fresh anymore. You’ll sit in front of a blank page, canvas, or screen, paralyzed by the fear that you’ve peaked. But guess what? That’s your brain preparing for a breakthrough. Embrace the stuck-ness. Take a break, try something absurdly outside your comfort zone, or revisit old work. Nine times out of ten, what feels like a dead end is just the universe telling you to make a sharp left turn. Embracing Change: Your Style Is a Living Thing If you’ve ever looked back at old work and cringed, congratulations—you’re growing. Your style isn’t meant to be static; it’s a reflection of who you are, and you’re not the same person you were last year (or even last week). Some artists resist change, clinging to what worked in the past, but evolution is what keeps your work—and your soul—alive. It’s okay to outgrow your old tricks. It’s okay to experiment again and again. The best artists are constantly reinventing themselves. Finding Your Voice in a World Full of Noise We live in a time where everyone is posting their work online, and it’s easy to feel like your style doesn’t stand out. But here’s the truth: no one else has your experiences, your perspective, or your quirks. Your style isn’t just the way you paint, photograph, or design—it’s how you see the world. Lean into that. Infuse your work with the things that make you, you. People resonate with authenticity, not perfection. Why This Journey Matters Developing a personal style isn’t about finding an endpoint; it’s about falling in love with the process. It’s about the frustration, the breakthroughs, the late nights staring at something you’re proud of, and the mornings you want to throw it all away. Your style is your story. It’s the map of everywhere you’ve been and a compass for where you’re headed. Parting Words for the Creatively Lost If you’re in the weeds, unsure of what your style even is, take a deep breath. You’re not behind. You’re exactly where you need to be. Keep making things—good, bad, weird, and everything in between. One day, you’ll look back at your work and see the thread that connects it all. And trust me, that moment is worth the mess. Your style is out there, waiting for you to find it. So grab your tools, embrace the chaos, and get to work.

Read more

The AI Revolution: Transforming Imagery

by Bill Tiepelman

The AI Revolution: Transforming Imagery

Discover how artificial intelligence is revolutionizing photography and design, offering new possibilities and reshaping the creative landscape. The dawn of artificial intelligence (AI) has marked a new era in various sectors, from healthcare and finance to entertainment and beyond. Yet, one of the most visually stunning transformations is happening within the realm of imagery—encompassing both photography and design. This revolution is not just about enhancing the quality of pictures or the efficiency of design processes; it's about fundamentally altering how we create, interpret, and interact with images. In this blog post, we will delve into how AI is reshaping the landscape of visual creativity, bringing forth new possibilities that were once deemed the stuff of science fiction. We will explore the evolution of this technology, its profound impact on photography and design, and the new frontiers it opens up for artists and professionals alike. Additionally, we'll address the ethical considerations and challenges that come with this revolutionary shift. Join us as we journey into the future of imagery, guided by the innovative hand of artificial intelligence. The Evolution of AI in Imaging Imaging technology has experienced exponential growth over the past few decades, evolving from simple photographic techniques to complex digital processes. This evolution has been significantly accelerated by the advent of artificial intelligence. Initially, AI in imaging was rudimentary, focused mainly on improving picture quality and automating basic tasks like color correction and object recognition. However, as technology advanced, so did the capabilities of AI, paving the way for more sophisticated applications and transformative changes. The integration of AI into imaging can be traced back to early experiments with neural networks and machine learning algorithms, which laid the groundwork for today’s advanced image processing tools. These early steps were crucial in teaching computers to 'see' and interpret visual data, much like humans do. From enhancing resolution to automating intricate editing processes, AI began to take on more complex roles. Key developments in AI imaging include the advent of deep learning and convolutional neural networks, which revolutionized the way machines understand and manipulate images. These technologies enabled unprecedented accuracy in image recognition, paving the way for features like facial recognition and real-time object detection in photography and video. Another milestone was the development of generative adversarial networks (GANs), which further blurred the lines between reality and AI-generated imagery. GANs allowed for the creation of highly realistic images from scratch, opening new doors for creative expression and commercial applications alike. The journey of AI in imaging is a testament to the relentless pursuit of innovation, marking a transition from mere enhancement tools to integral elements of the creative process. This journey not only reflects technological advancements but also a changing landscape where creativity and AI intersect in exciting and unpredictable ways. Revolutionizing Photography with AI The integration of artificial intelligence into photography has shifted the paradigm from traditional capturing techniques to innovative, AI-enhanced processes. This transformation is not just about making images clearer or more aesthetically pleasing; it's about redefining what's possible with a camera. Enhancements in Photo Editing and Processing One of the most immediate impacts of AI in photography has been in the realm of photo editing. Tools powered by AI algorithms can now automatically enhance photos, correcting issues such as exposure, focus, and color balance in seconds, tasks that once required hours of manual labor. Moreover, AI can remove objects from images, swap backgrounds, or even alter lighting conditions post-capture, empowering photographers to achieve their envisioned results with unprecedented ease. AI in Photography Automation Beyond editing, AI has automated numerous aspects of photography, making it more accessible and efficient. Features like smart scene recognition adjust camera settings in real-time to capture the best possible shot under varying conditions. Meanwhile, facial recognition technology ensures focus and exposure are optimized for human subjects, enhancing the quality of portrait photography. Algorithms and New Capabilities I algorithms have introduced capabilities previously unimaginable in photography. For example, computational photography, a technique heavily reliant on AI, combines multiple images taken at different exposures to create a single high-dynamic-range (HDR) photo. Similarly, AI-driven software can stitch together images to create seamless panoramic shots or employ depth sensing for bokeh effects without the need for professional lenses. Real-World Applications and Examples The real-world applications of AI in photography are vast and growing. In wildlife photography, AI-powered cameras can detect and track animals, ensuring perfect timing for shots without human intervention. In sports and action photography, AI algorithms can predict movement and focus accordingly, capturing crisp images of fast-moving subjects. Additionally, AI is revolutionizing stock photography by generating realistic and customizable images, reducing the need for extensive photoshoots. The revolution of photography by AI is ongoing and expansive. It's not just changing how professionals work but also democratizing photography, allowing novices to produce high-quality images with minimal effort. This shift is fostering a new era of creativity and exploration in photography, where the technical barriers to capturing the perfect shot are continually being eroded by the advancing tide of artificial intelligence. Transforming Design with AI Tools The transformative impact of AI on design is as significant as its influence on photography, if not more. In the realm of graphic design, illustration, and even web design, AI tools are changing the way creators approach their work, from conception to execution. Impact on Graphic Design and Illustration AI has begun to play a crucial role in graphic design and illustration, automating time-consuming tasks and offering new methods for creating complex visuals. For instance, AI-powered design software can now suggest color palettes, generate design elements, and even create entire layouts based on user-defined parameters. This not only speeds up the design process but also helps designers explore new creative avenues without the constraints of traditional tools and techniques. Designers can leverage AI to generate unique patterns, textures, and shapes, pushing the boundaries of conventional aesthetics. Illustrators, too, find value in AI as it aids in transforming basic sketches into detailed artworks, interpreting and enhancing the artist's intent with surprising intuition and accuracy. Examples of AI-driven Design Tools There are several AI-driven design tools that have made waves in the industry. Programs like Adobe Sensei harness AI to streamline workflow processes, from cropping images intelligently to refining vector graphics automatically. Other tools, such as Canva’s Magic Resize, use AI to adapt designs for different platforms and formats effortlessly, a task that previously required manual adjustment and considerable time. Emerging platforms like DALL-E and Artbreeder go further, allowing users to create complex images from textual descriptions or by blending existing visuals, respectively. These tools embody the potential of AI to not only assist in the design process but to inspire new forms of artistic expression. Case Studies Showcasing AI-driven Design Projects Real-world case studies underscore the potential of AI in design. For example, some companies have used AI to develop branding materials, from logos to marketing collateral, with systems that analyze industry trends and consumer preferences to suggest designs that align with current tastes and company identity. In product design, AI algorithms can predict consumer preferences and help designers create more appealing product features and interfaces. The transformation of design through AI tools is empowering professionals and amateurs alike to realize their visions in ways previously unimaginable. By automating routine tasks and offering new creative possibilities, AI is not just changing the landscape of design; it's expanding it, inviting all to explore and innovate beyond traditional boundaries. New Possibilities Unleashed The advent of AI in the realms of photography and design is not merely about streamlining existing processes; it's about opening doors to entirely new possibilities. These advancements are setting the stage for a future where the boundaries of creativity are constantly expanding, enabling artists, designers, and photographers to explore genres and styles that were once out of reach. Exploration of New Genres and Styles AI's ability to learn and adapt is fostering the emergence of new artistic genres and styles. Artists and designers are experimenting with AI-generated art, which can produce unique and unpredictable results, blending elements from various schools and periods of art in innovative ways. This AI-assisted creativity is not only giving birth to new forms of visual expression but is also democratizing art creation, making it more accessible to those without formal training. Expanding the Boundaries of Creativity and Art With AI, the creative process is no longer confined by the limitations of human skill or imagination. For instance, AI can generate high-resolution images from rough sketches, fill in details in incomplete compositions, or even create complex 3D models from simple descriptions. This enables creators to bring their wildest fantasies to life with precision and fidelity previously unimaginable. Future Prospects and Ongoing Experiments The potential for AI in the creative domain is vast and still largely untapped. Ongoing experiments with AI in art and design continue to yield surprising and thought-provoking results. Researchers and innovators are exploring ways to combine AI with other technologies, like virtual reality and augmented reality, to create immersive and interactive art experiences. The future promises even more sophisticated AI tools that will further remove technical barriers, allowing creators to focus on the essence of their artistic vision. The impact of AI on imagery is a testament to the dawn of a new era in creative expression. As we continue to explore these new possibilities, we are not just witnessing a transformation in how art is made; we are participating in the redefinition of what it means to be creative. Ethical Considerations and Challenges As the AI revolution continues to transform imagery in photography and design, it brings with it a host of ethical considerations and challenges that must be addressed. The power of AI to create and manipulate images introduces questions about authenticity, originality, and the moral implications of these technological advancements. Authenticity and Originality One of the primary concerns surrounding AI-generated imagery is the issue of authenticity. As AI becomes more adept at creating realistic images, distinguishing between what is real and what is AI-generated becomes increasingly difficult. This blurring of lines can have significant implications, especially in fields like journalism or historical documentation, where authenticity is paramount. Furthermore, the ease with which AI can produce original works raises questions about the value and definition of human creativity and artistic originality. Intellectual Property Rights and Copyright Issues The proliferation of AI-generated images also presents challenges in terms of intellectual property rights and copyright. Determining the ownership of an AI-created piece can be complex, especially when the AI draws inspiration from existing works. This situation necessitates a reevaluation of copyright laws to accommodate the new dynamics introduced by AI in the creative process. The legal framework must evolve to protect the rights of creators while fostering innovation and respecting the contributions of AI. Ethical Use of AI in Imagery and Societal Impacts The ethical use of AI in imagery extends beyond legal considerations to encompass societal impacts. There are concerns about the potential for AI-generated images to spread misinformation, manipulate public opinion, or perpetuate biases. Ensuring that AI is used responsibly and ethically requires transparency about the use of AI-generated content and ongoing efforts to mitigate biases within AI systems. Furthermore, as AI tools become more accessible, there's a growing need to educate users about ethical practices in AI-generated imagery. Artists, designers, and photographers must navigate these new tools with an understanding of their implications, striving to use AI in a way that respects ethical standards and contributes positively to society. In conclusion, while AI's impact on imagery offers exciting possibilities, it also necessitates a careful consideration of ethical issues. Balancing innovation with integrity will be crucial as we navigate this new landscape, ensuring that the AI revolution in imagery enriches rather than undermines our cultural and moral values. The AI revolution in imagery is undeniably transforming the fields of photography and design, ushering in an era of unprecedented creativity and innovation. As we have explored, this transformation brings not only new capabilities and opportunities but also significant ethical challenges and considerations. As we move forward, it is essential for creators, consumers, and policymakers to engage with these changes thoughtfully and responsibly. By embracing the potential of AI while being mindful of its implications, we can ensure that the revolution in imagery enhances our world without compromising our values. The journey into the AI-enhanced future of imagery is just beginning. With continued exploration, ethical engagement, and creative collaboration, we can harness the power of AI to open new vistas of artistic expression and cultural understanding. Let us embrace this journey with open minds and responsible hearts, ready to shape a future where technology and creativity converge in harmony.

Read more

Explore Our Blogs, News and FAQ

Still looking for something?